Cameras
Supported Cameras
View compatible IP cameras and required specifications
Adding Cameras
Learn how to add and configure new cameras
Camera Details
View and manage camera information
Scenarios
Configure detection scenarios for each camera
Events
View and manage detected events
Livestream
Access real-time camera feeds
Recording
Configure and manage video recordings
Remove Camera
Learn how to remove cameras from the system
Supported Cameras
VisionAI supports a wide range of IP cameras including:
- ONVIF-compliant IP cameras
- RTSP stream cameras
- HTTP stream cameras
- USB cameras (when connected to edge device)
- LTE Network Cameras
Please refer to Supported Cameras Guide for more details on supported cameras. Regardless of the camera type, the following are the minimum requirements:
- Resolution: 1080p (1920x1080)
- Frame rate: 20 fps
- Intranet bandwidth per camera: 2MBPS
- Protocol support: RTSP, ONVIF, or HTTP
- Network connectivity: Ethernet, WiFi or LTE
Adding Cameras
Connecting your cameras to VisionAI is straightforward. Follow these steps to integrate your existing camera infrastructure:
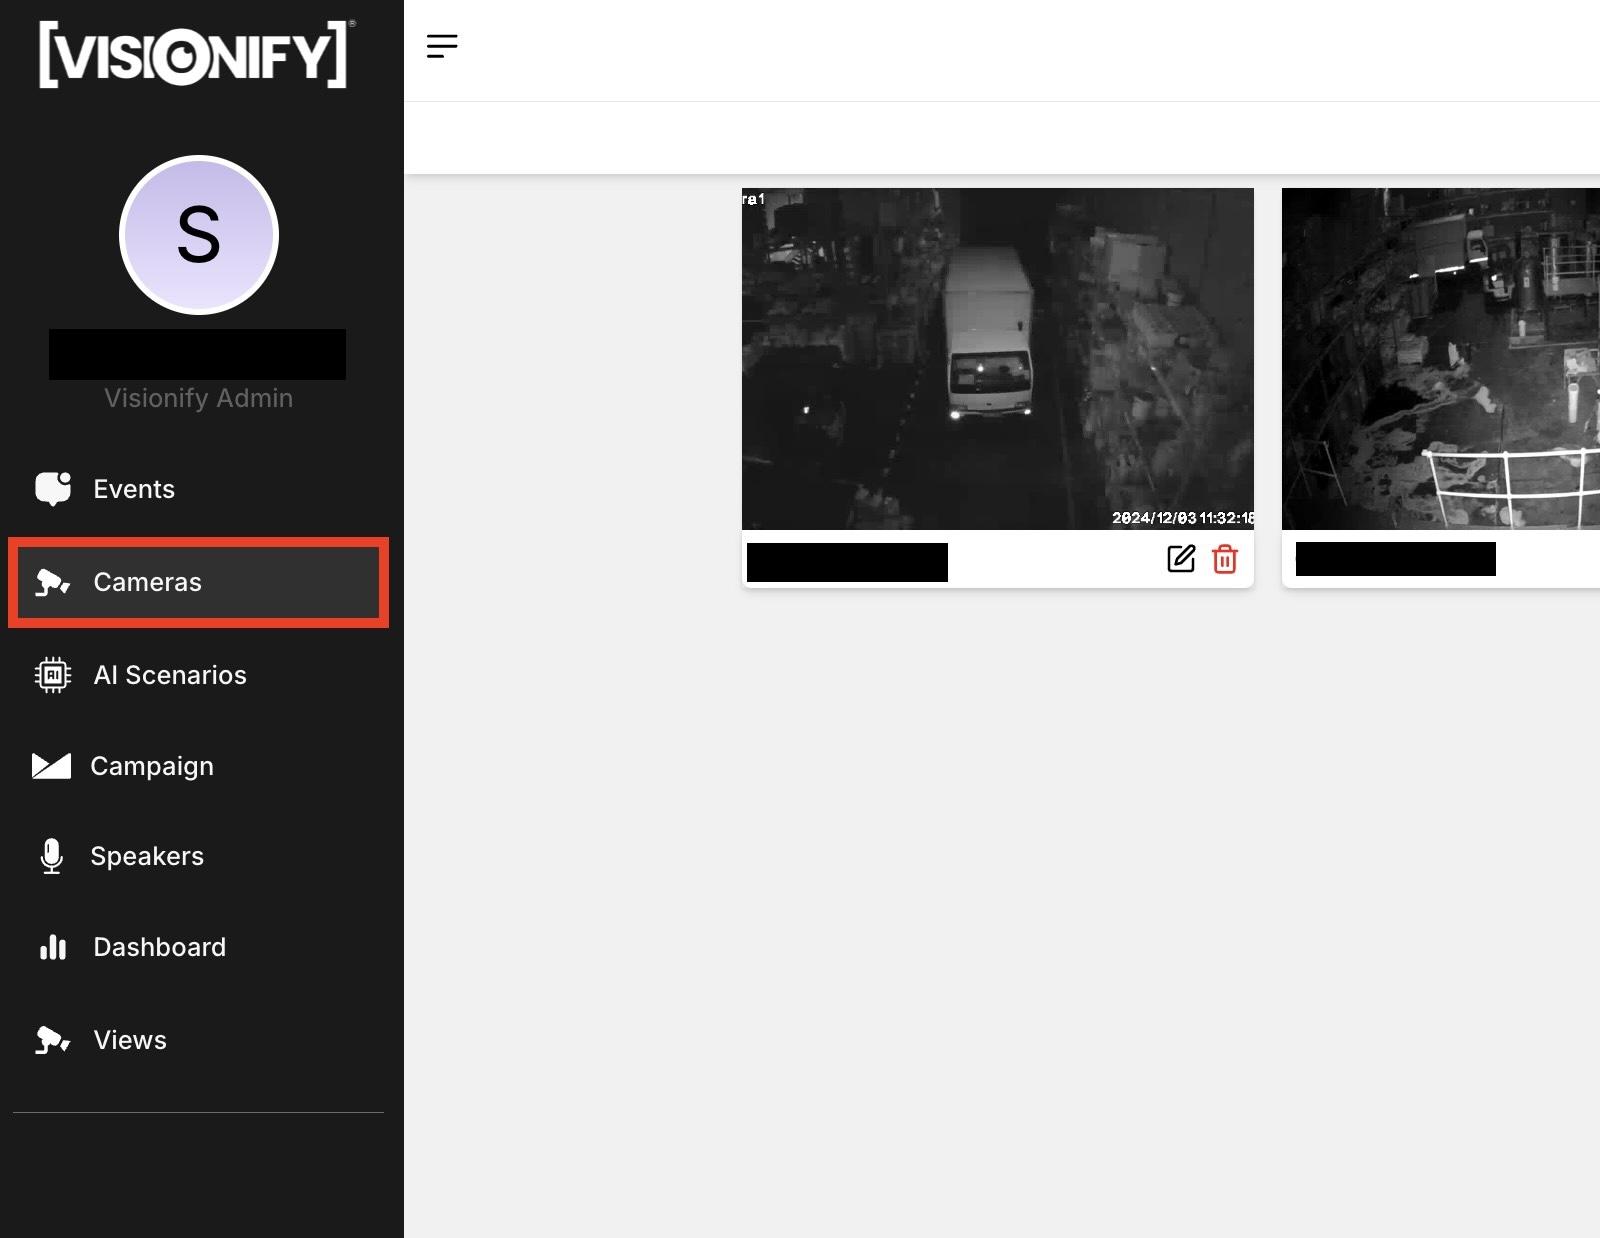
1. Go to Cameras Page
Navigate to the Cameras page from the main dashboard. Here you'll see all your connected cameras and their status.
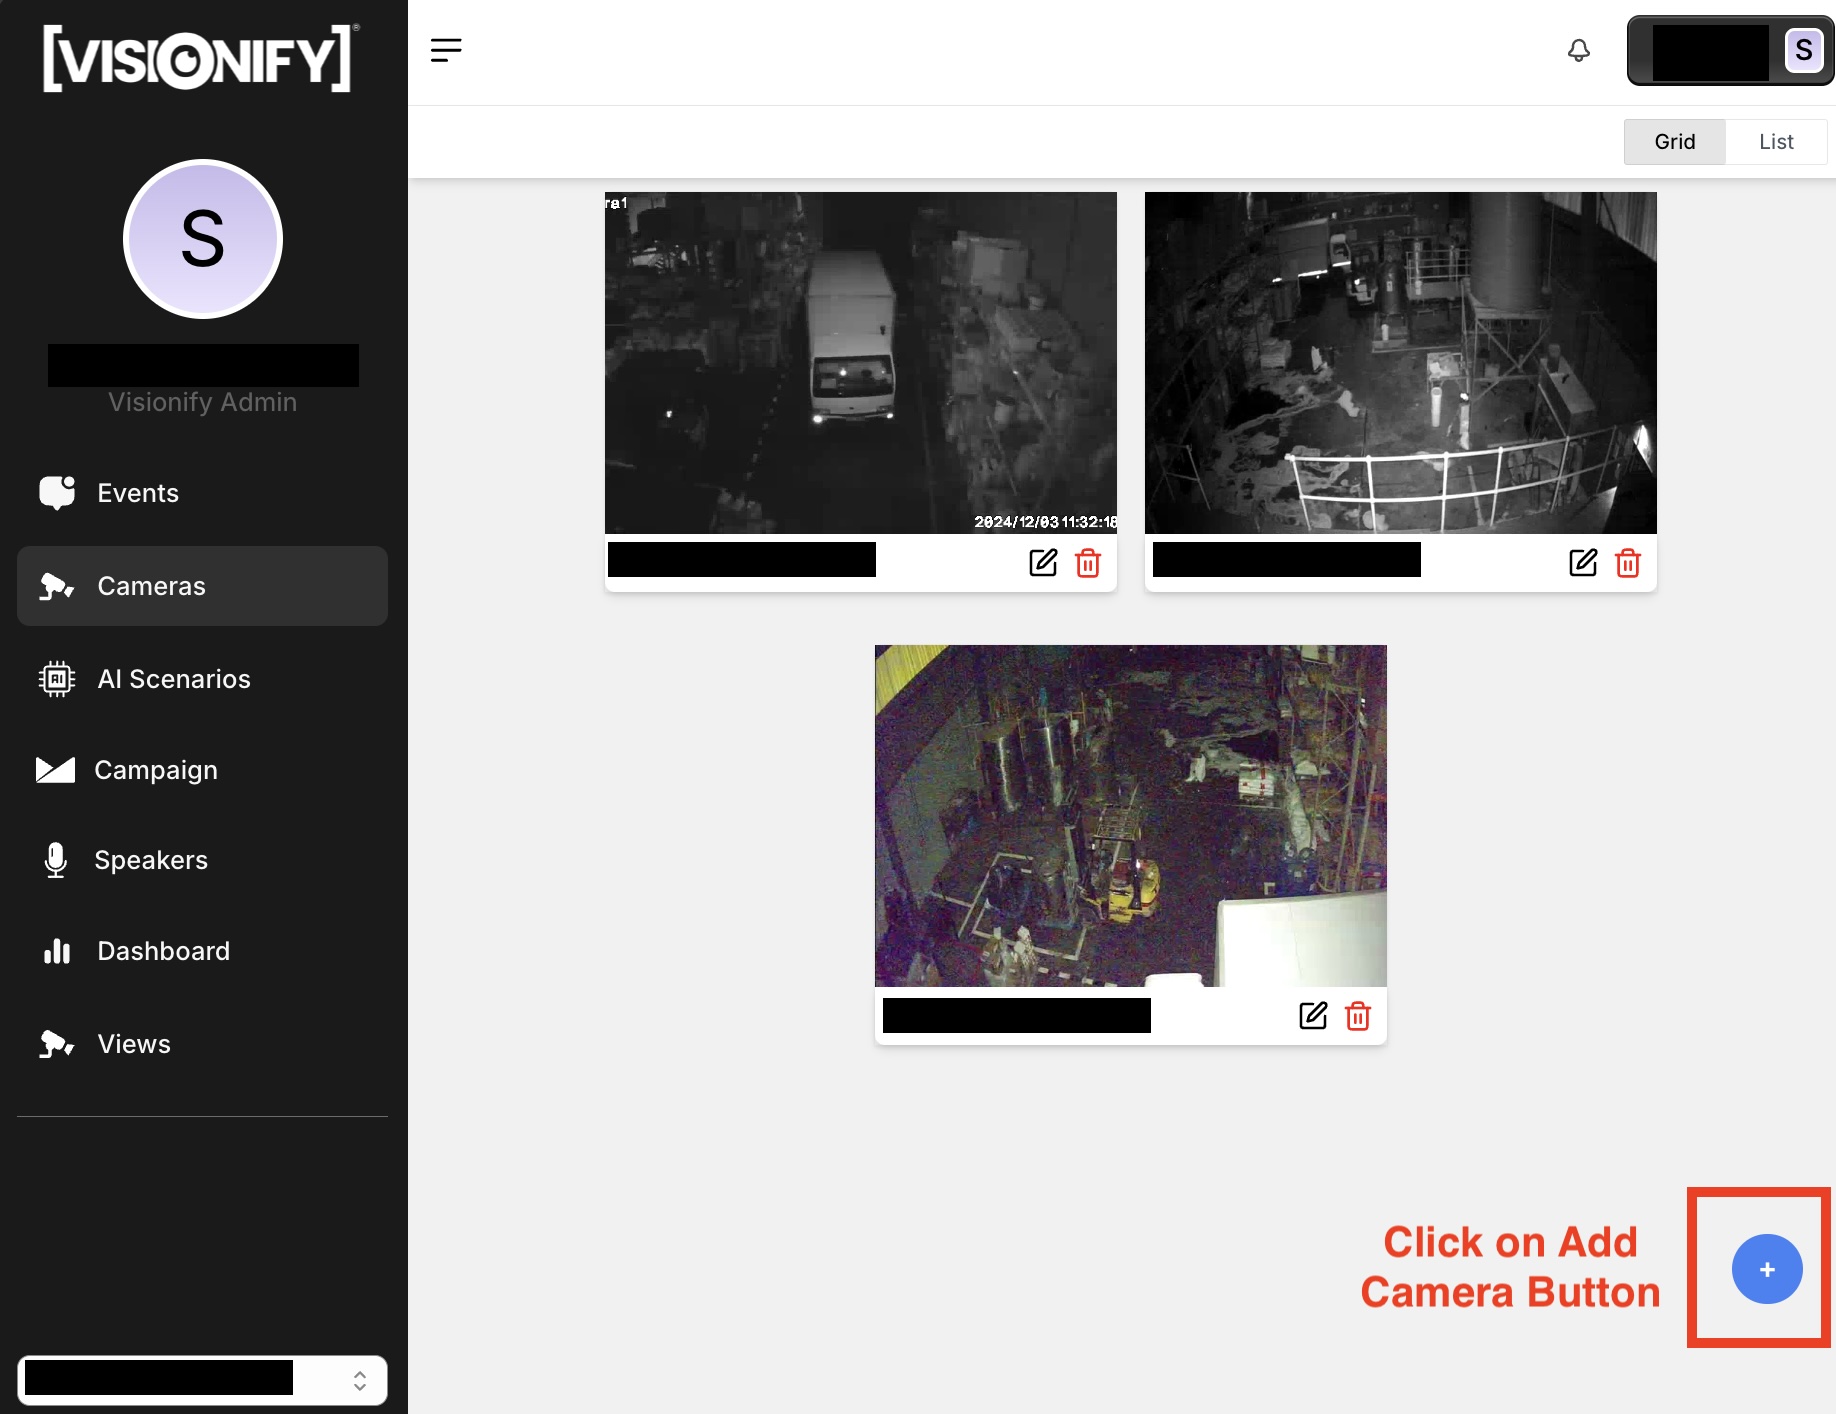
2. Add New Camera
Click on the "Add Camera" button to begin the integration process. VisionAI supports IP cameras, CCTV systems, and NVR/DVR setups.
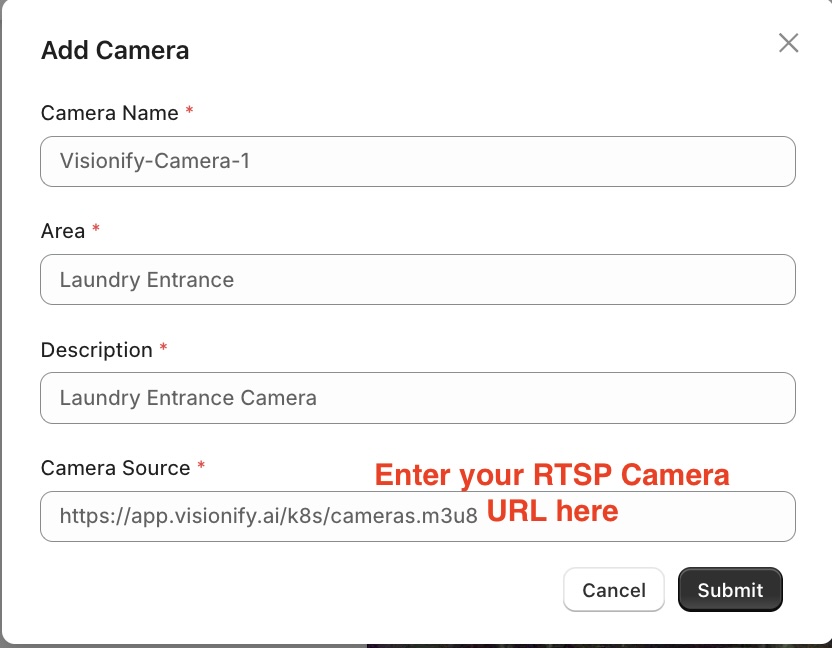
3. Provide Camera Details
Enter your camera details including name, RTSP URL, and location. Test the connection to ensure proper setup before saving.
Note
- Test your Camera RTSP URL to make sure it is playing. You can test it using VLC Player.
- Initially, you will see a blank screen for camera. The screenshot for the camera will update once the camera is connected.
Camera Details
You can click on any camera to view its details.
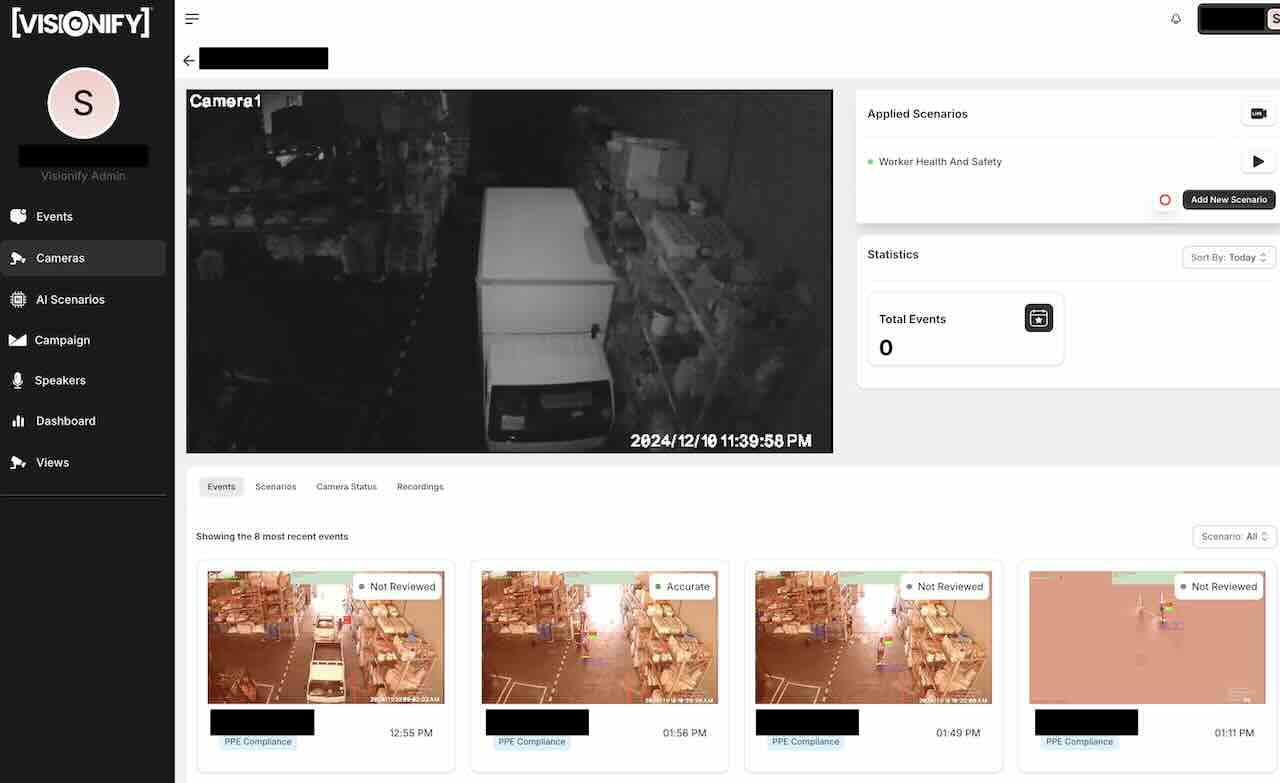
1. Click on a Camera
Click on a camera to view its details. The camera details page will show the status of the camera, the AI scenarios applied to the camera, recent events, livestream options, recording options and more.

2. View Recent Events
On the camera details page - we show the last 8 events for the camera. We also show the total number of events in the last 24hrs, 7 days, or 30 days. To dig more into events, you can visit the Events page.
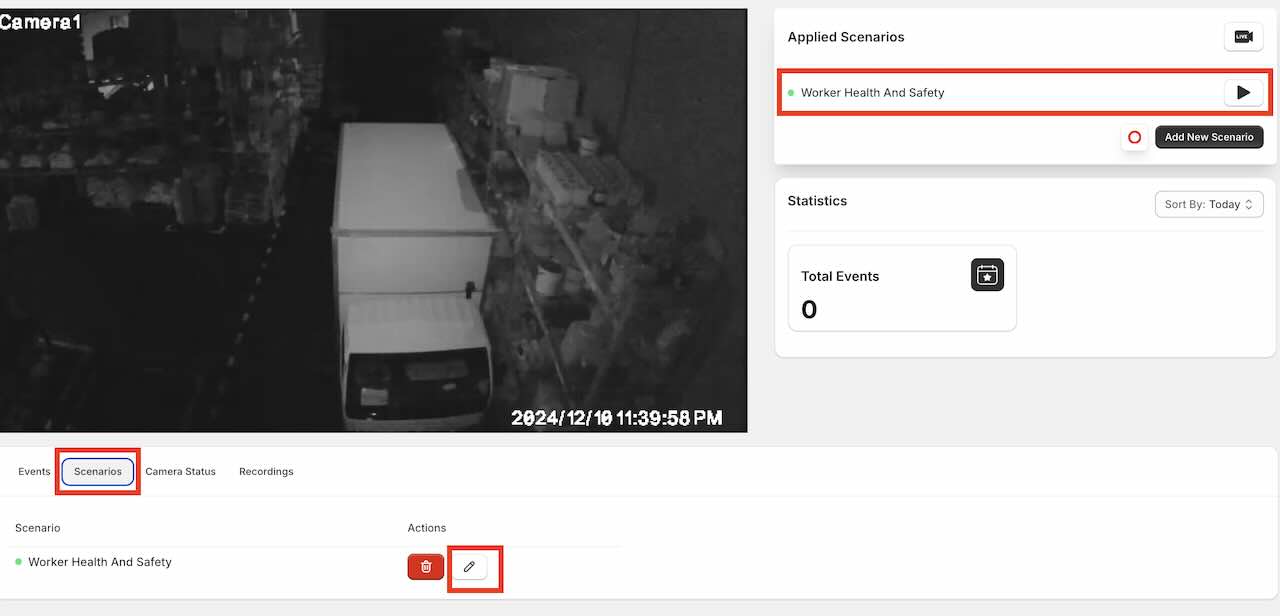
3. View/Edit AI Scenarios
View or Edit the AI scenarios configured for the camera. Currently applied scenarios are highlighted on the right.

4. View Livestream
Click on the view live-stream button to view the live-inference view of the camera.

5. Record Inference Video
Record live inference video from the camera. The recorded video is available under the Recordings tab.
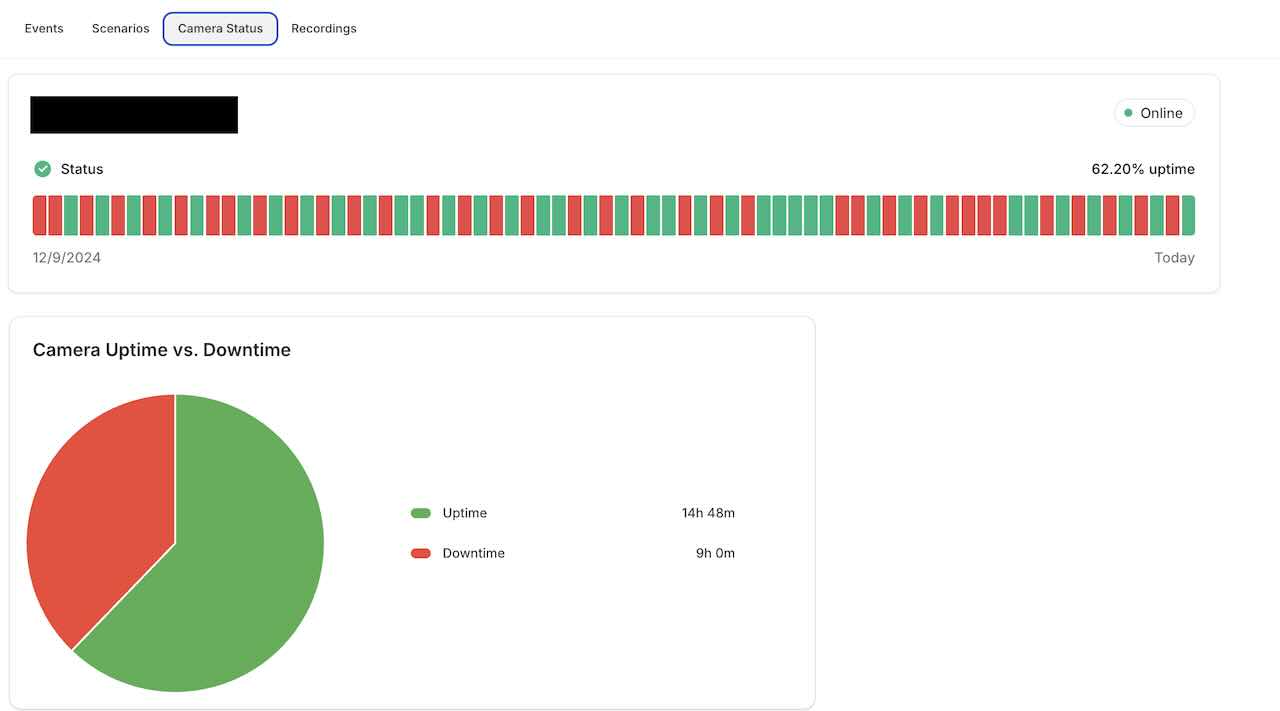
6. View Camera Status
Sometimes cameras might not be streaming. This page will show you the status of the camera.
Camera Scenarios
You can configure scenarios from the camera details page.

1. View/Edit AI Scenarios
Camera Details page shows all the AI scenarios avaialble for the camera. You can add a new scenario by clicking the "Add Scenario" button.
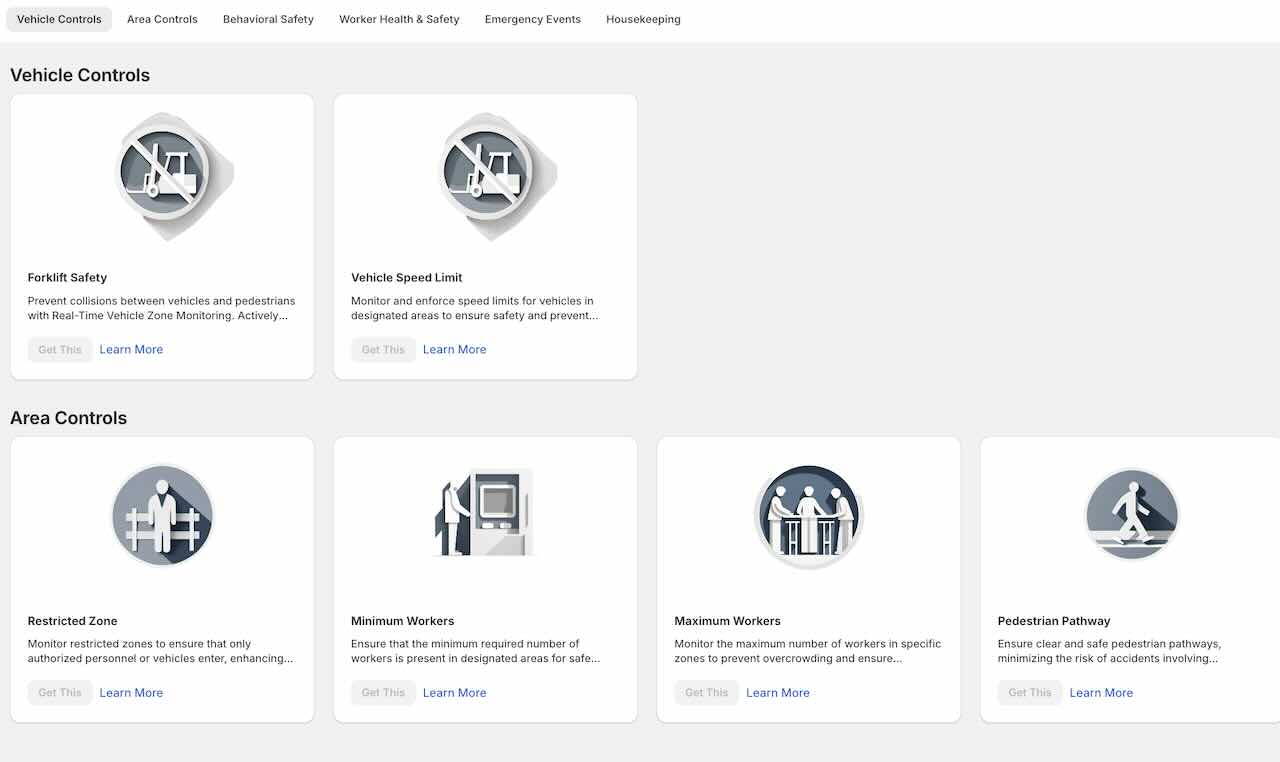
2. Add AI Scenario
Adding AI scenario is a 3 step process. First, you select the scenario. We support a wide variety of scenarios. Once you click on Get this - it will walk you through setting up zones & detection parameters for the scenario.
Camera Events
Most recent 8 events for the camera are shown on the camera details page. You can view details about each event by clicking on the event. For filtering/sorting events from all cameras - please visit the Events page.

1. Click on a Camera
Click on a camera to view its details. The camera details page will show the status of the camera, the AI scenarios applied to the camera, recent events, livestream options, recording options and more.

2. View Recent Events
On the camera details page - we show the last 8 events for the camera. We also show the total number of events in the last 24hrs, 7 days, or 30 days. To dig more into events, you can visit the Events page.
Livestream
Livestream allows you to access real-time camera feeds from the camera. We support inference live-stream - that way you can see what we are inferencing in real-time:

View Livestream
Click on the view live-stream button to view the live-inference view of the camera.
Recording
Recording feature allows to record 10 minutes of video. Just click on the record video button at the right corner of the camera details page.

Record Video
Click on the record video button at the right corner of the camera details page. The recorded video is available under the Recordings tab.
Camera Removal
To remove a camera from the system, you can navigate to Camera Listing Page. From here, you see an option to remove the camera.
Data Retention
Camera removal doesn't automatically delete historical data. Configure data retention policies separately.
Next Steps
Contact Information
contact_phone Sales Inquiries
Get in touch with our sales team for demos and pricing information.
- Email: sales@visionify.ai
- Phone: +1 720-449-1124
support_agent Technical Support
Need help? Visit our support portal or contact our technical team.
calendar_month Schedule a Demo
See VisionAI in action with a personalized demo from our team.