Visionai Web Application Instructions
VisionAI: Advanced AI for Enhanced Workplace Safety
VisionAI by Visionify offers a dynamic web application designed to enhance workplace safety through advanced AI technology. VisionAI ensures enhanced workplace safety with minimal setup.
Main Functionalities of the VisionAI Web Application:
1.Camera Onboarding:
Easily onboard any IP cameras into the VisionAI system for complete workplace safety monitoring.
2.AI Scenario Management:
Pick and choose AI scenarios to run on your IP cameras, customized to your safety needs.
3.Event and Notification Configuration:
Configure events and set up notifications via email, text, and Teams to stay informed in real-time.
4.Violation Recording:
Set up event-specific video recordings to capture and retain evidence of safety violations.
VisionAI helps organizations enhance their safety measures by using advanced AI technology. This technology makes it easier to monitor and manage safety, ensuring that the workplace is both safer and meets regulations.
Basic Usage
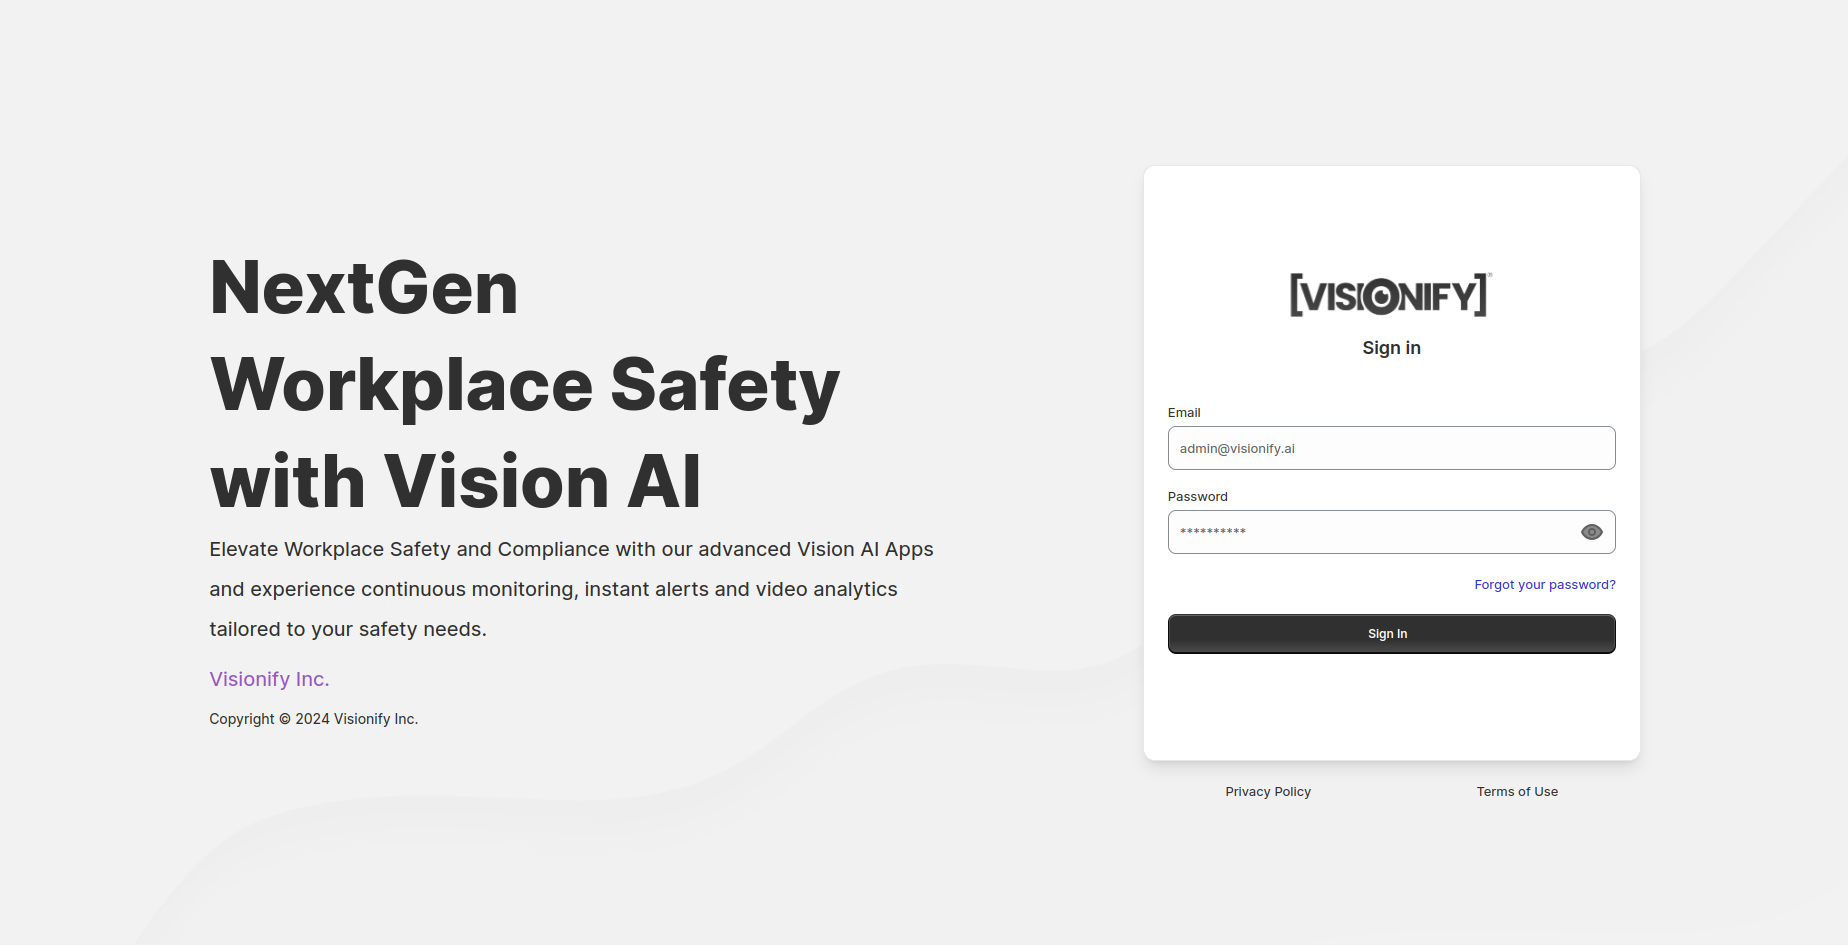
- Please open localhost in the browser.
- Use your default username/password as master/master.
- After this, you will be asked to create a new admin user. Please use a strong password and create an admin user.
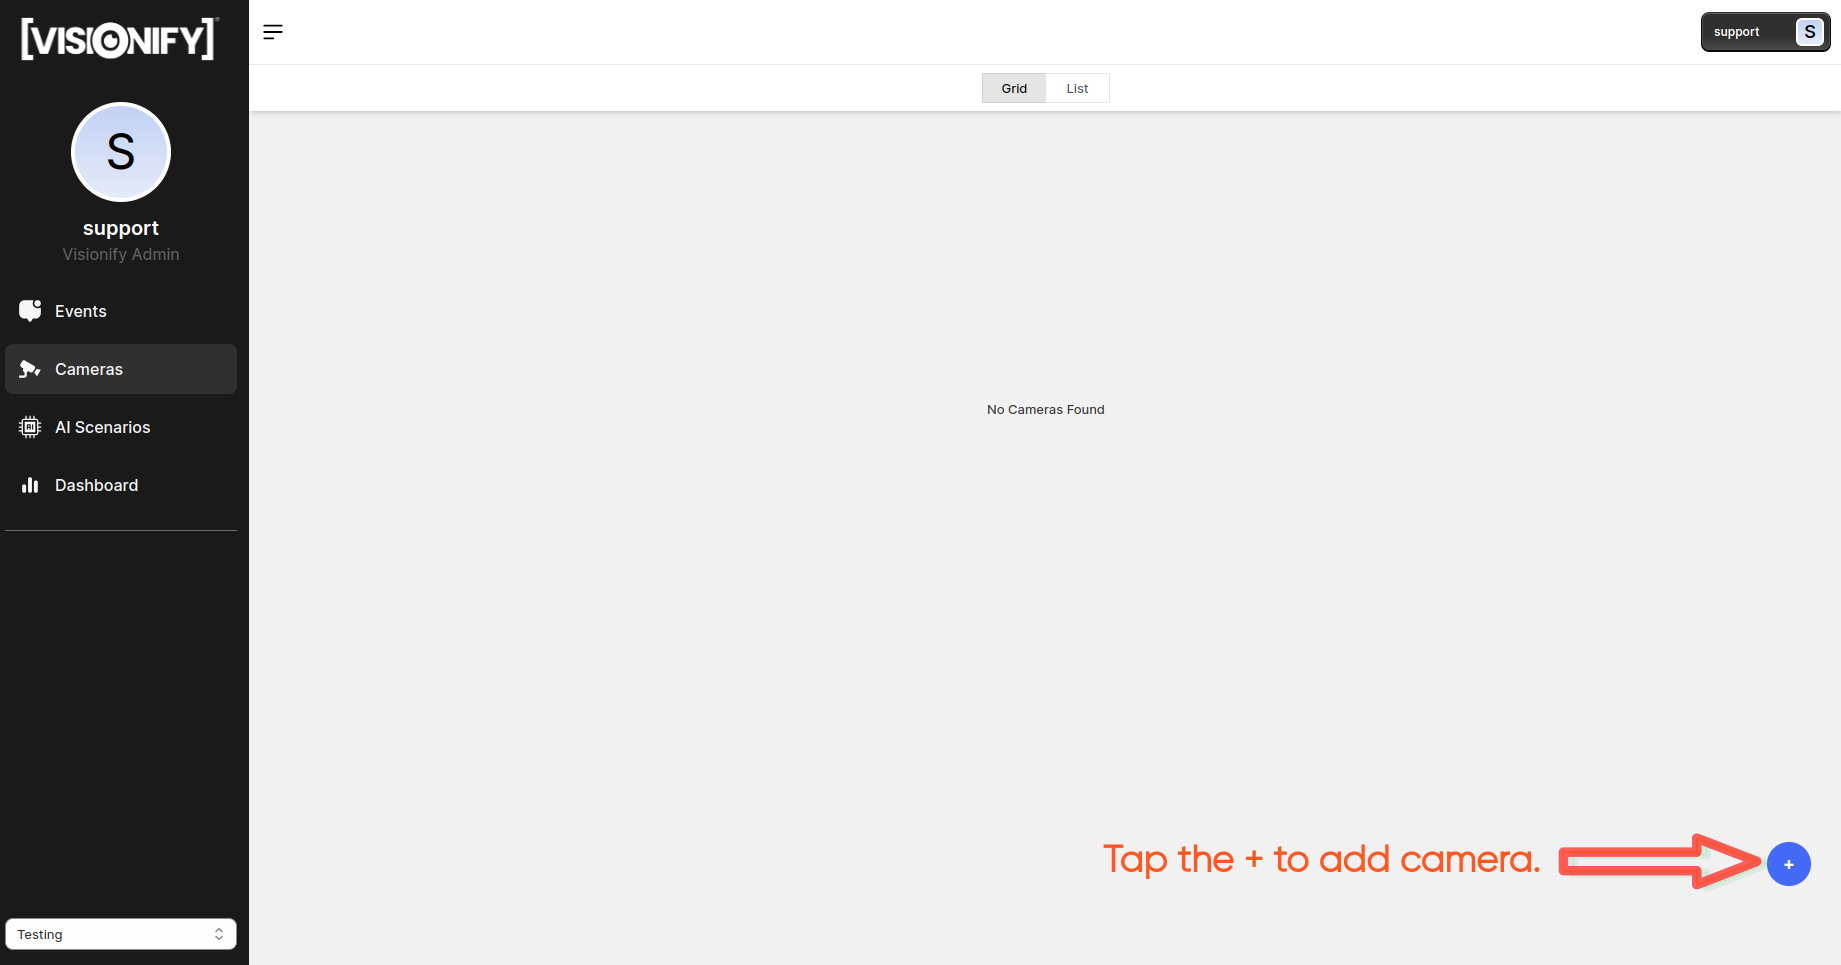
Cameras
Once you are signed in, you will see a blank dashboard page. Let’s add an IP camera to the system. In order to do this, 1. Go to the “Cameras” tab on the left menu bar. 2. Then Click on the + button.
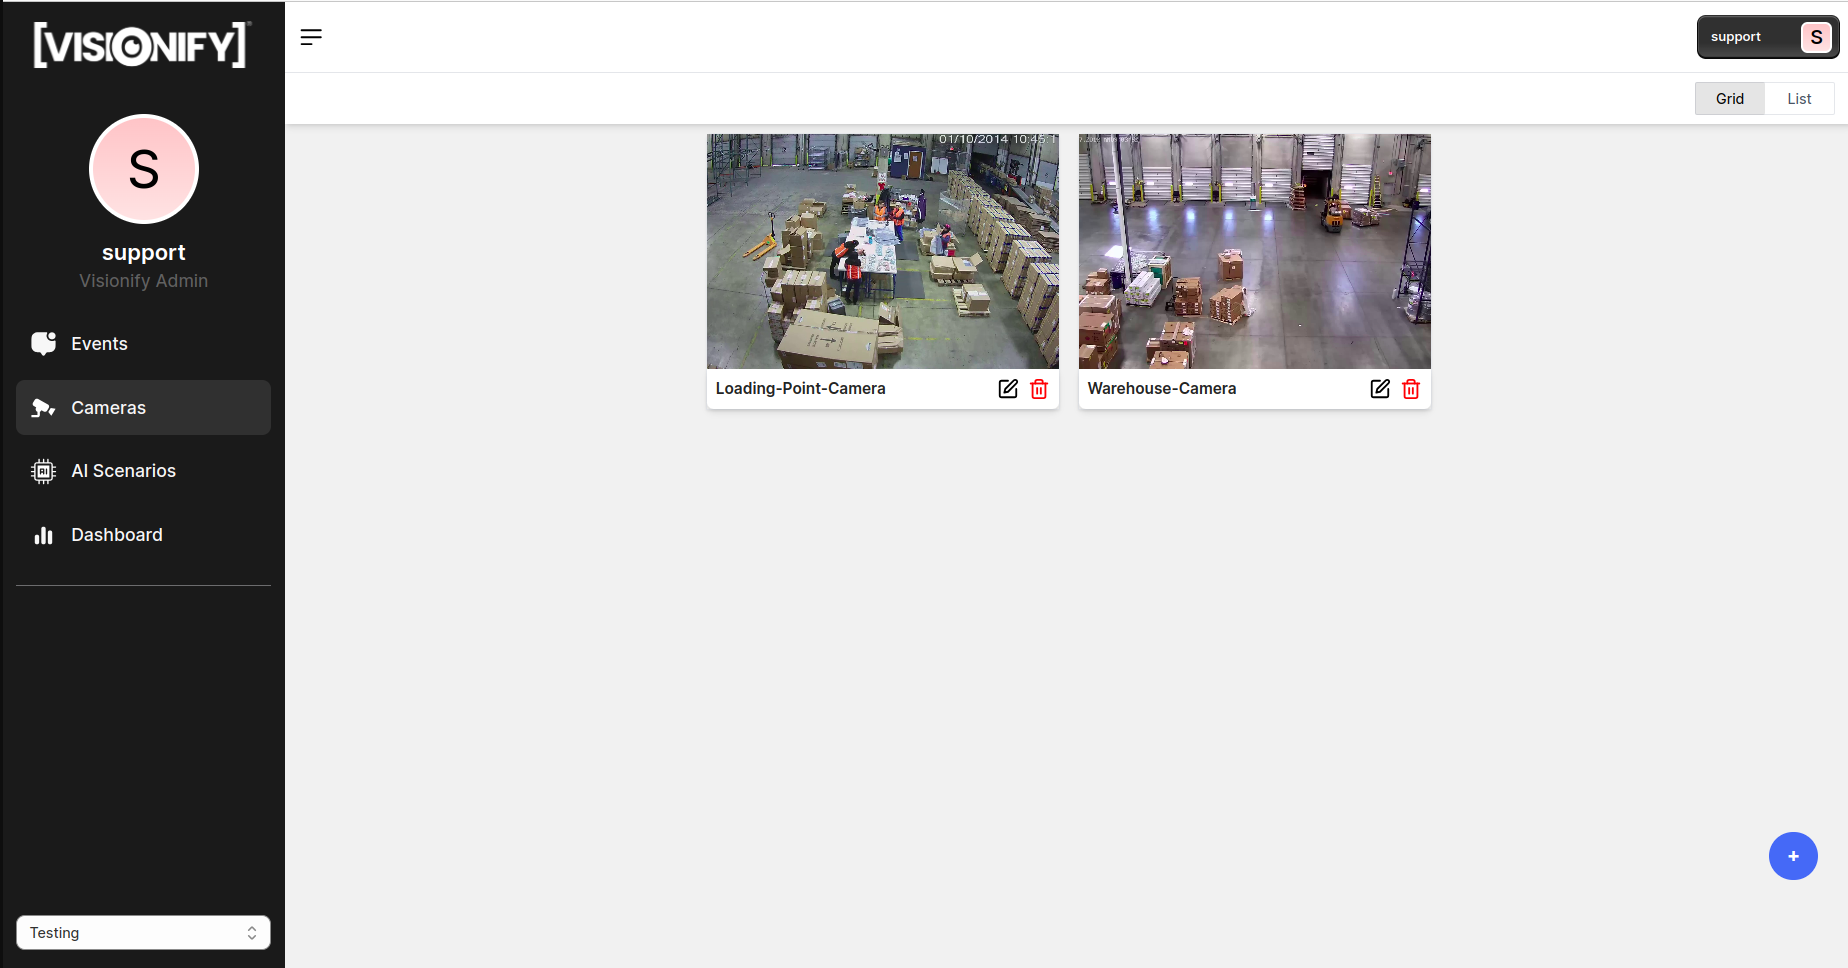
A new pop-up window will appear to add cameras. You can enter the camera name, description, and RTSP URI for the camera. The RTSP URI can be obtained from the Camera or NVR documentation. You can ignore the other fields as they are optional. Click on “Add” button.

Once you have added the camera, it should appear on the Cameras window and should show the initial streaming for the camera. Add any additional cameras in a similar fashion. Once all cameras have been added, the front-screen should look like this:
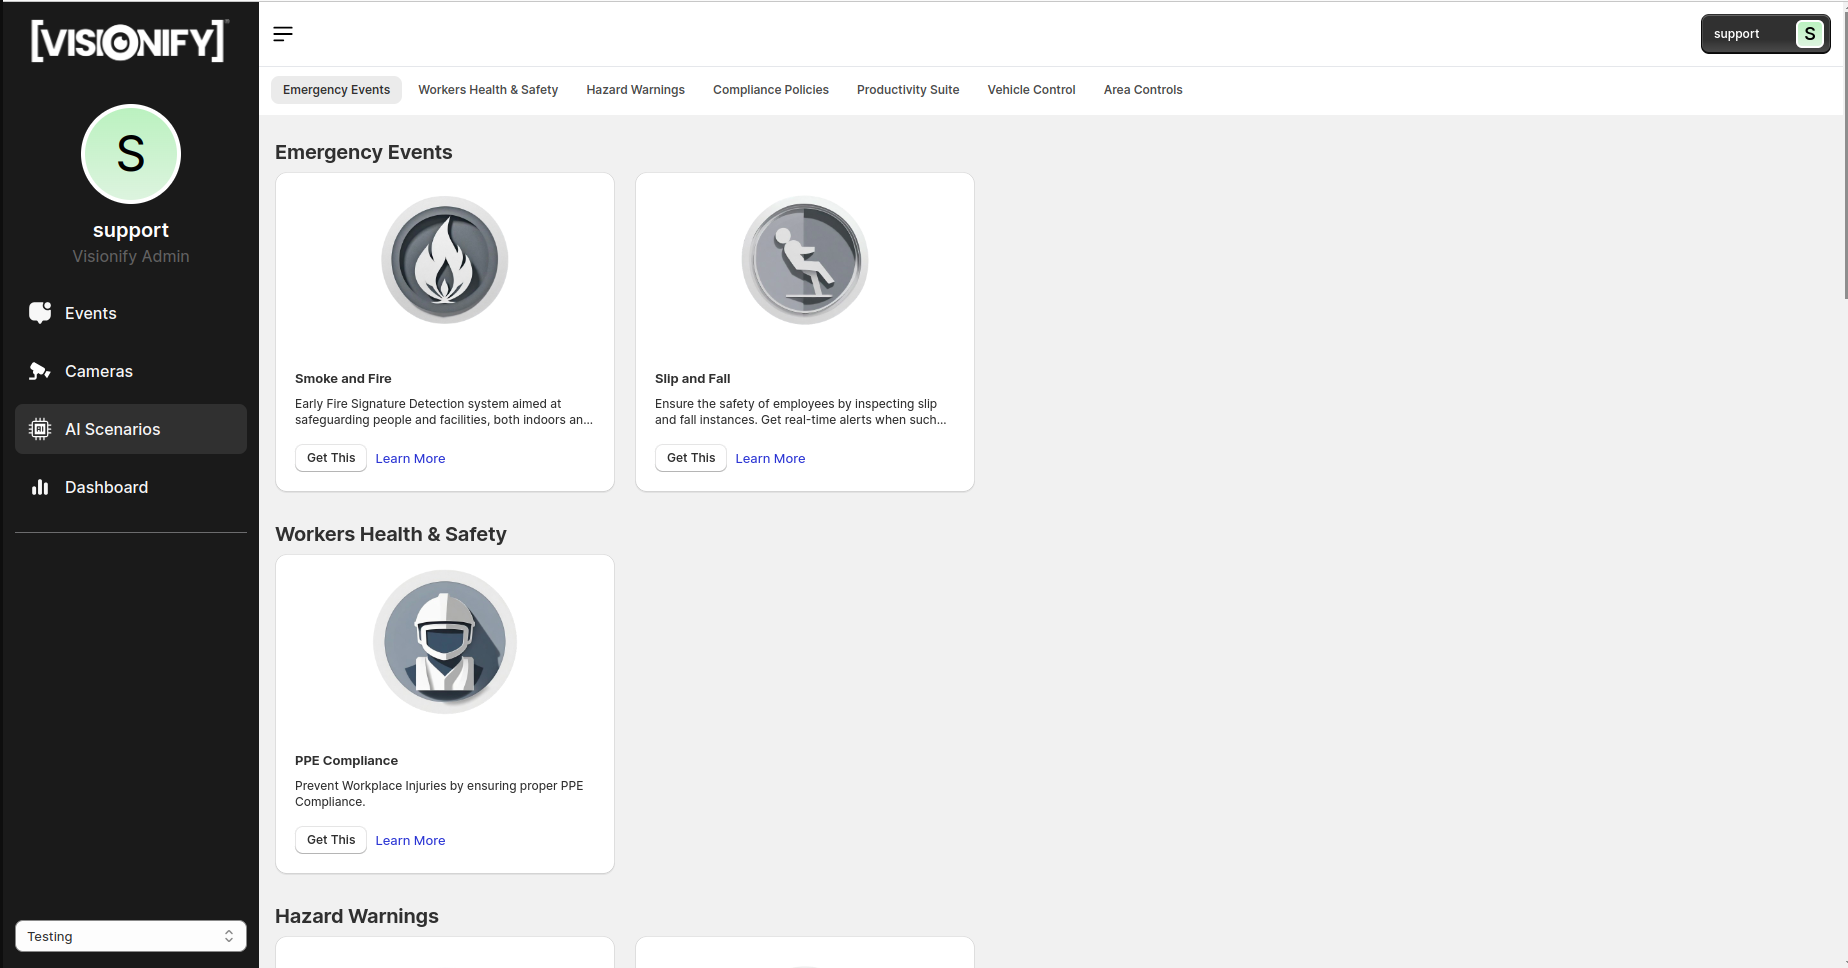
Scenarios
Once you are signed in, you will see a blank dashboard page. You may select any scenario from the list of active scenarios.
This shows details about the Scenario.You can now click on the “Get this” button again to apply the scenario to cameras.

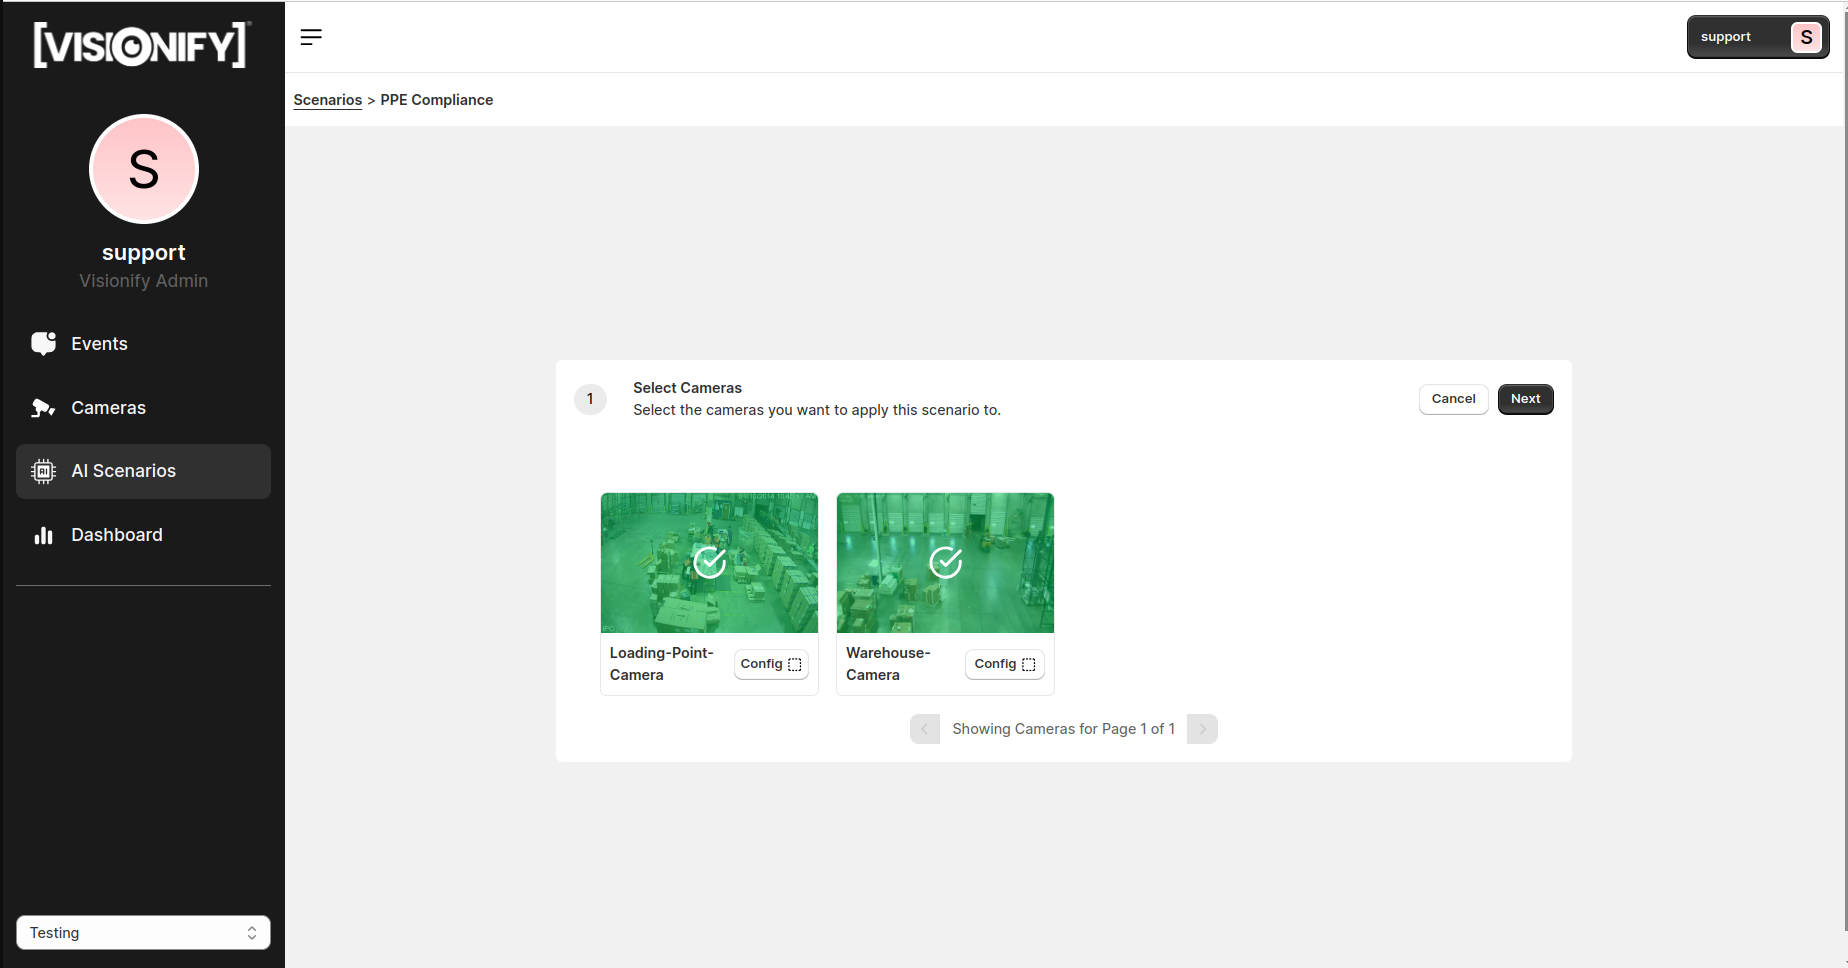
In the next page, Select the Cameras for which you want to apply this scenario. Click “Save and Next”
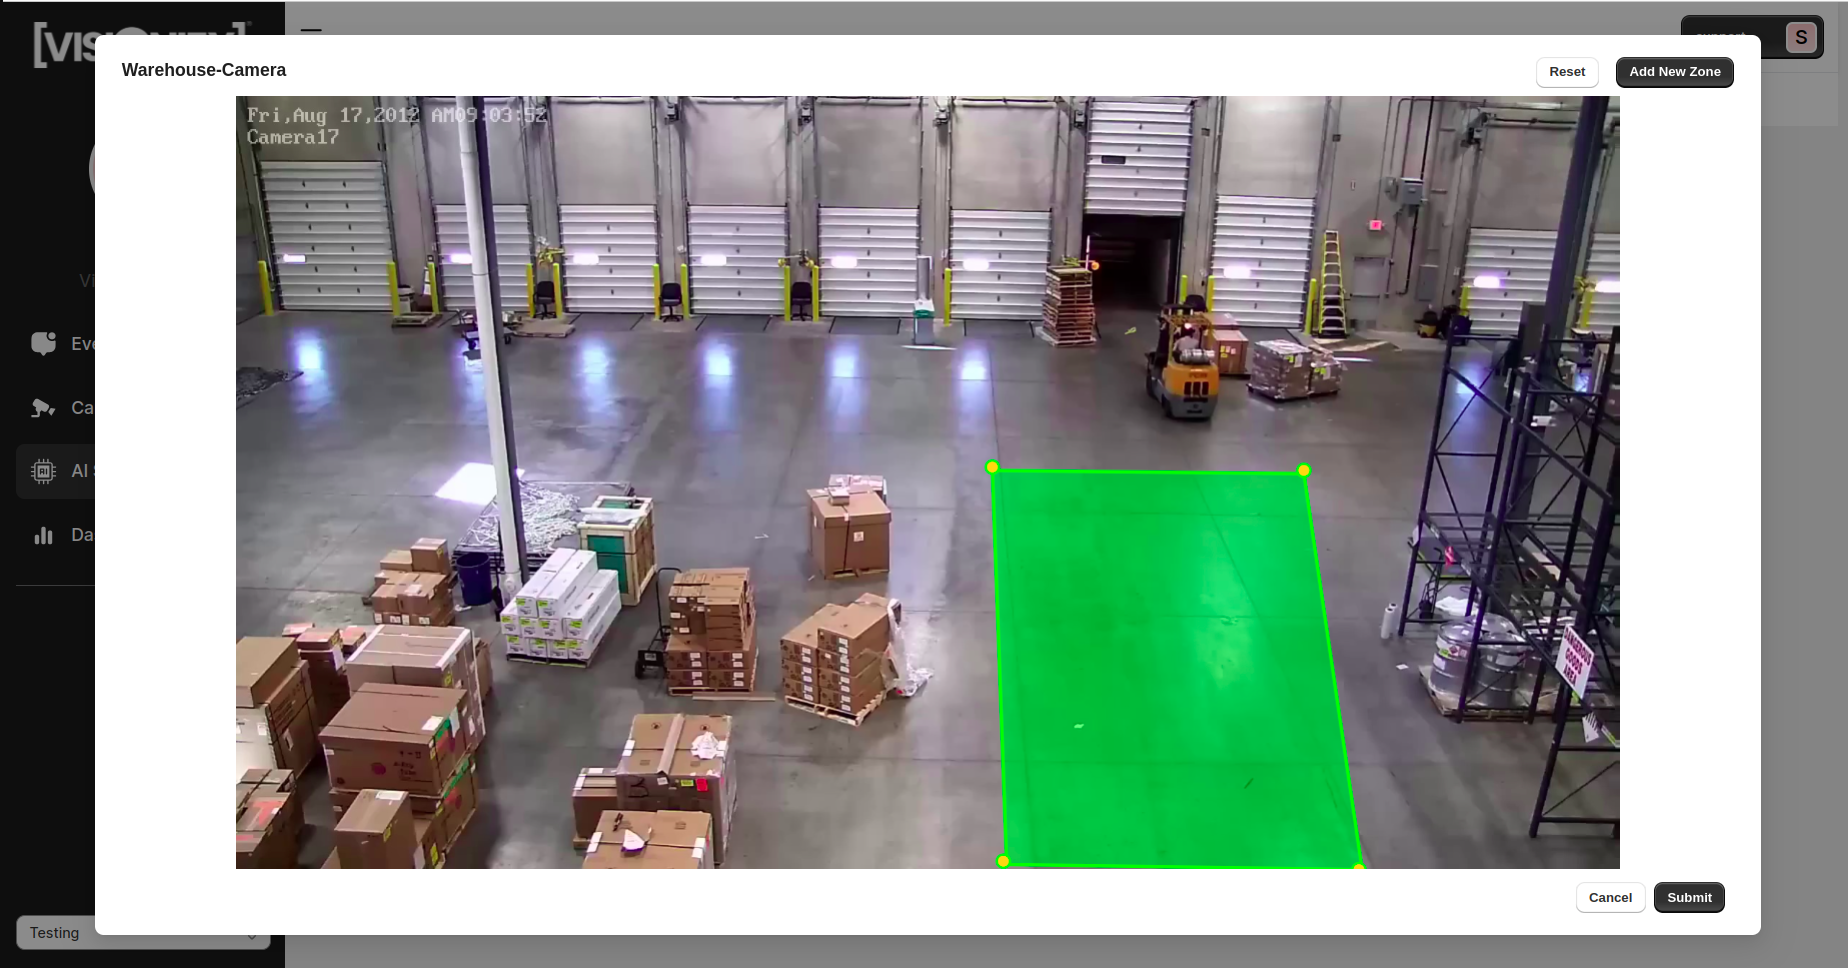
Next, ensure you check the config box to proceed to the camera thumbnail. On the camera thumbnail page, create a zone directly. After creating the zone, click the "Submit" button to save your changes. Then, proceed by clicking on the "Next" button.
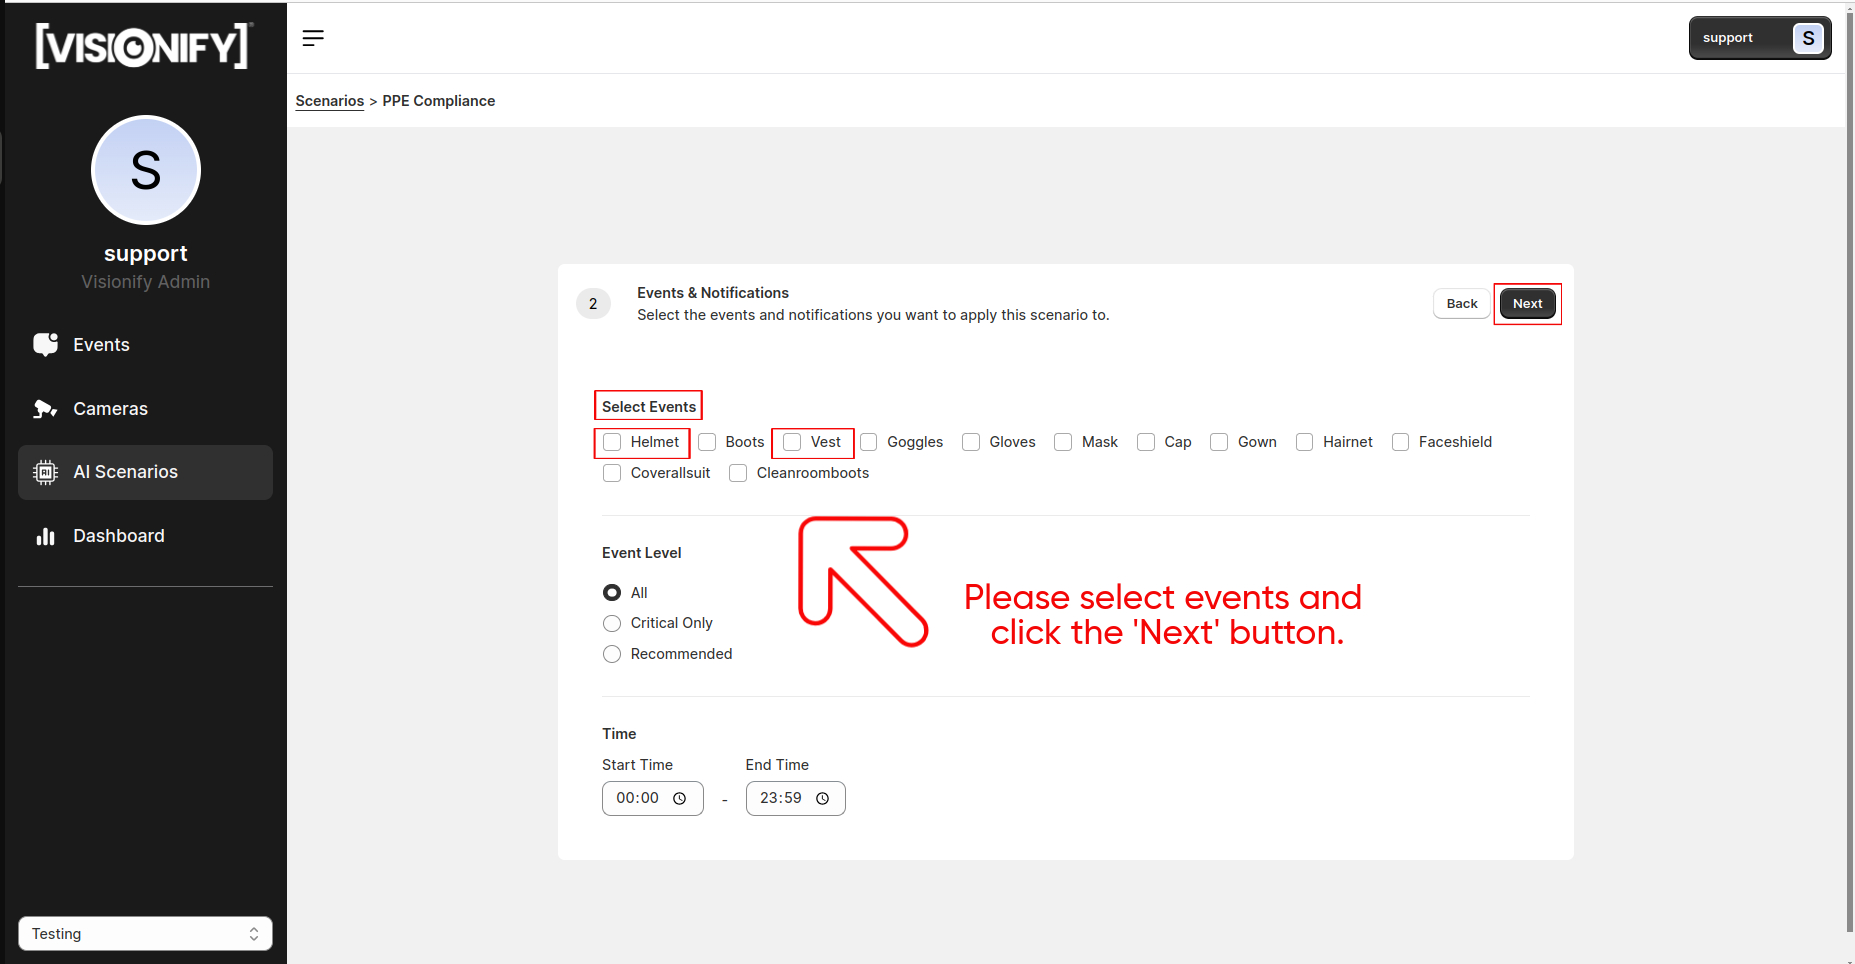
In the following step, mark the "Select Events" option, then click the "Next" button. You have successfully applied the scenario to the camera.
Events
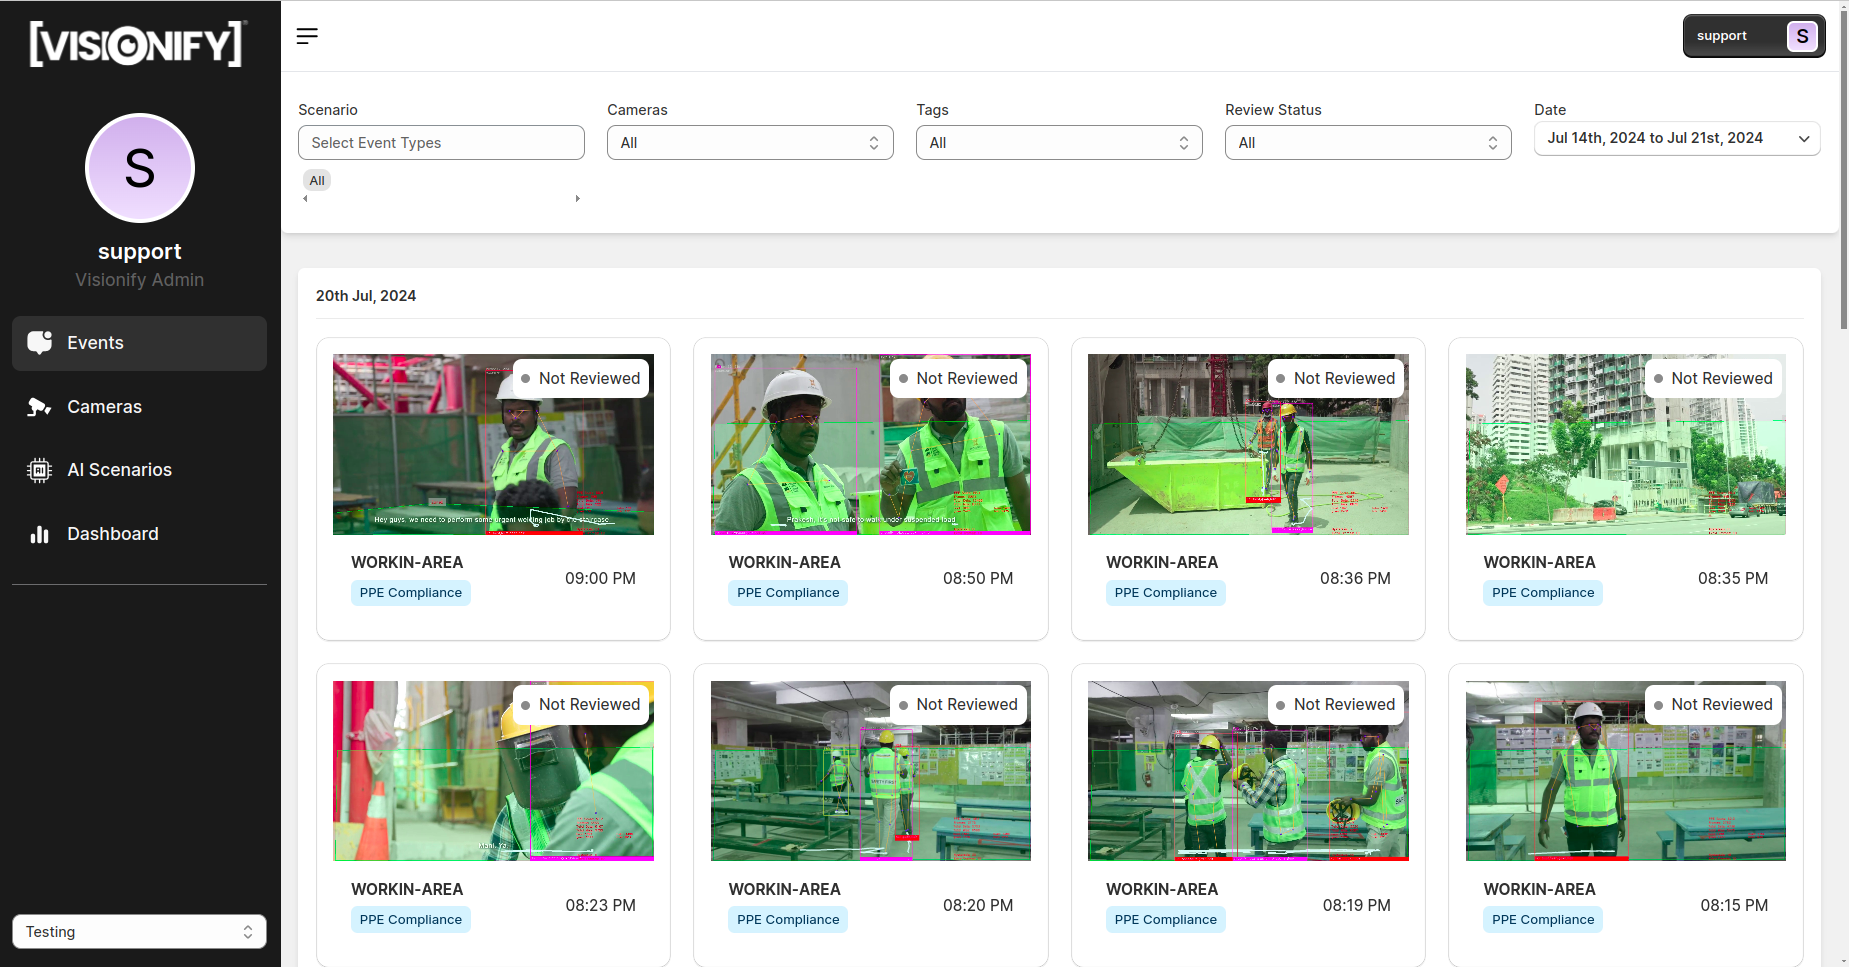
This page will show the list of events that have occurred in the selected time frame.
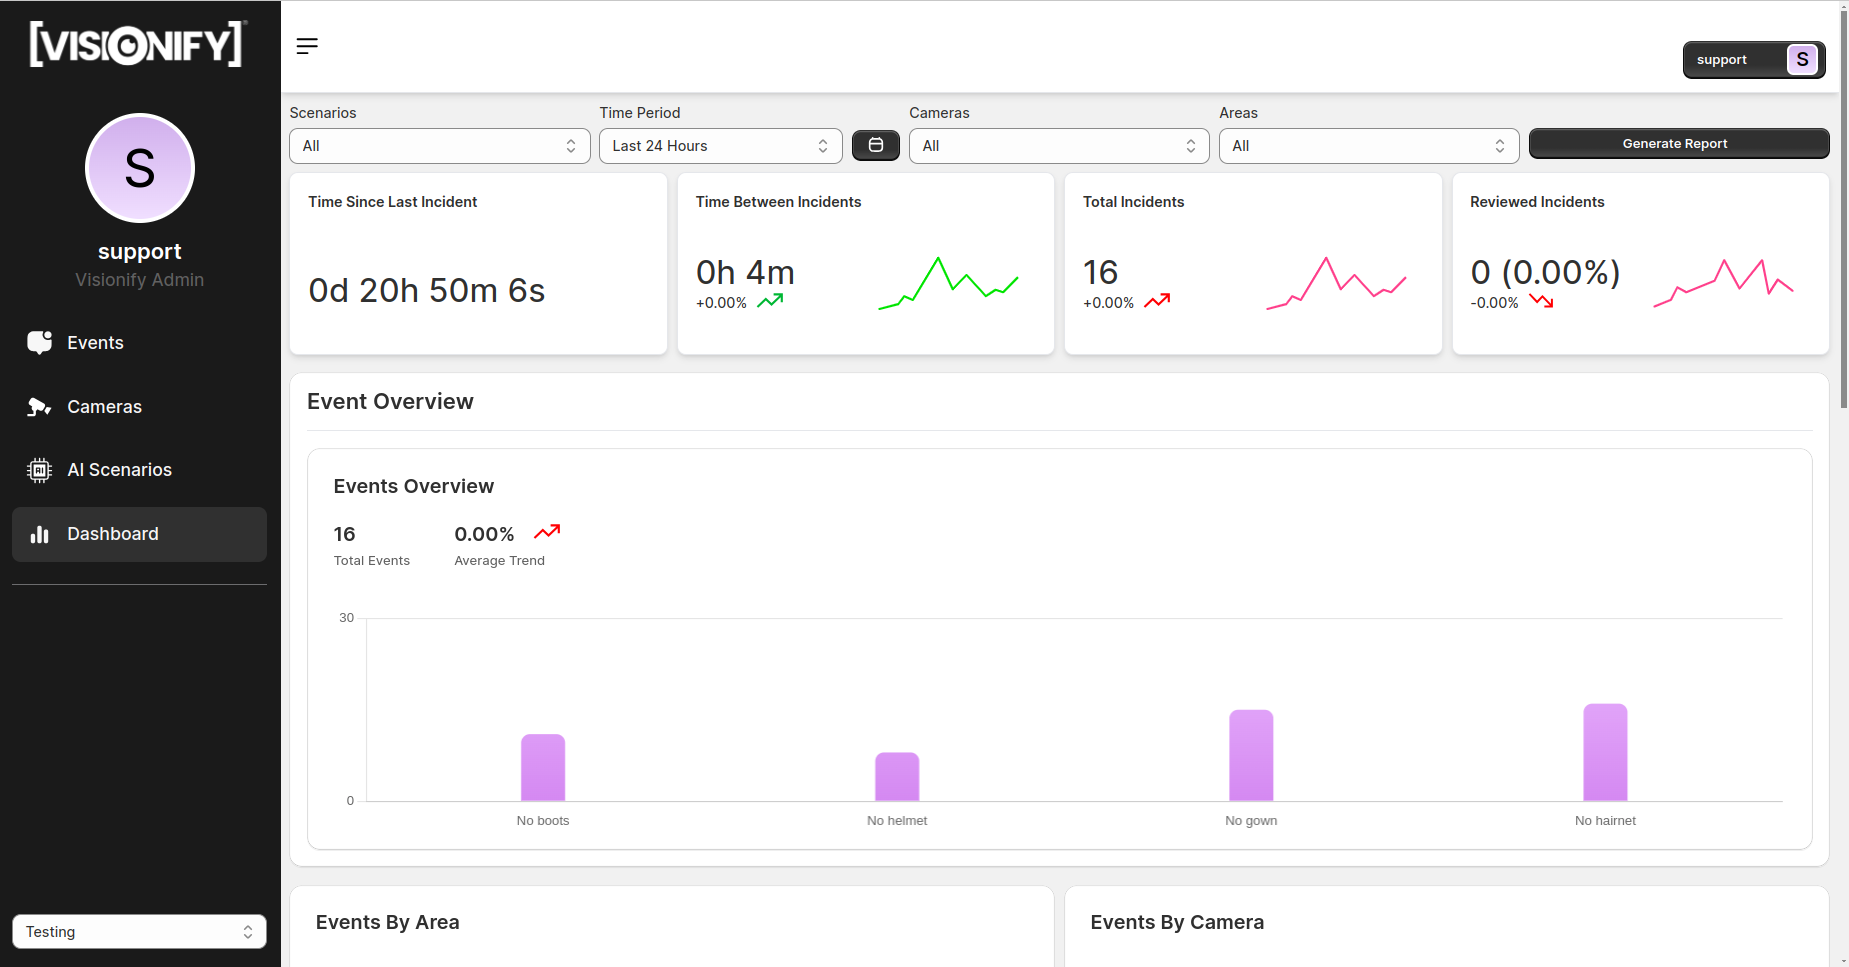
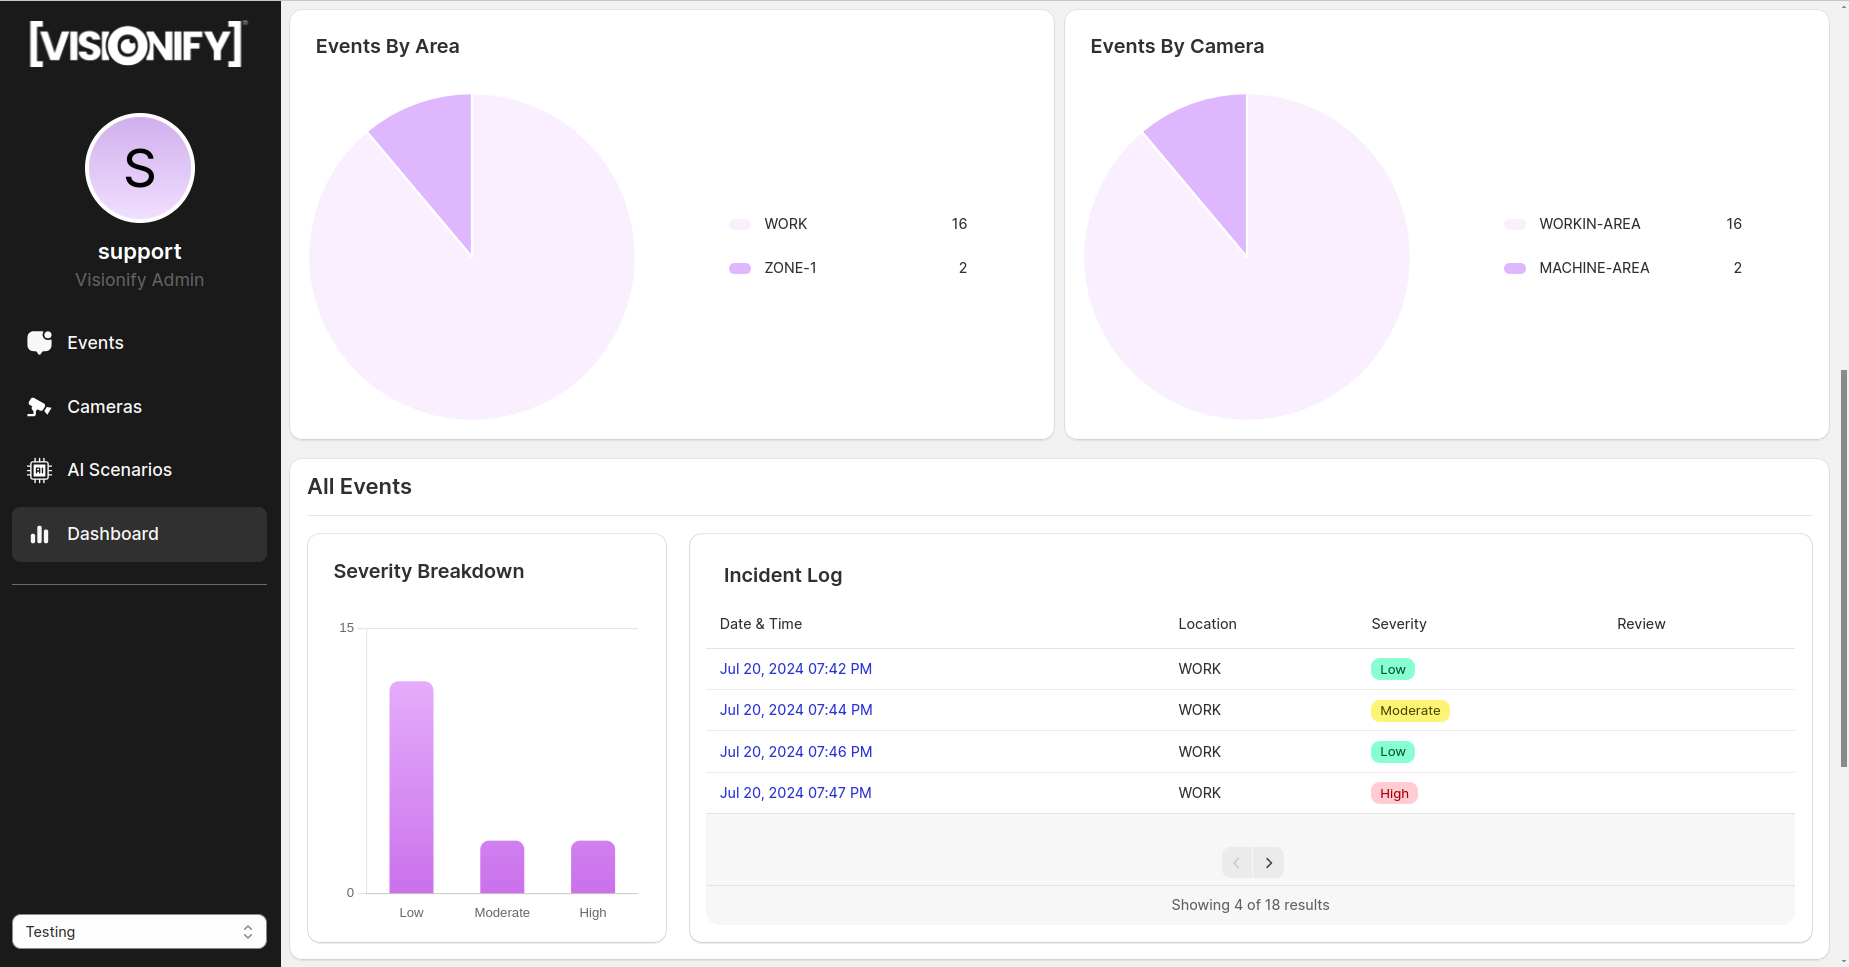
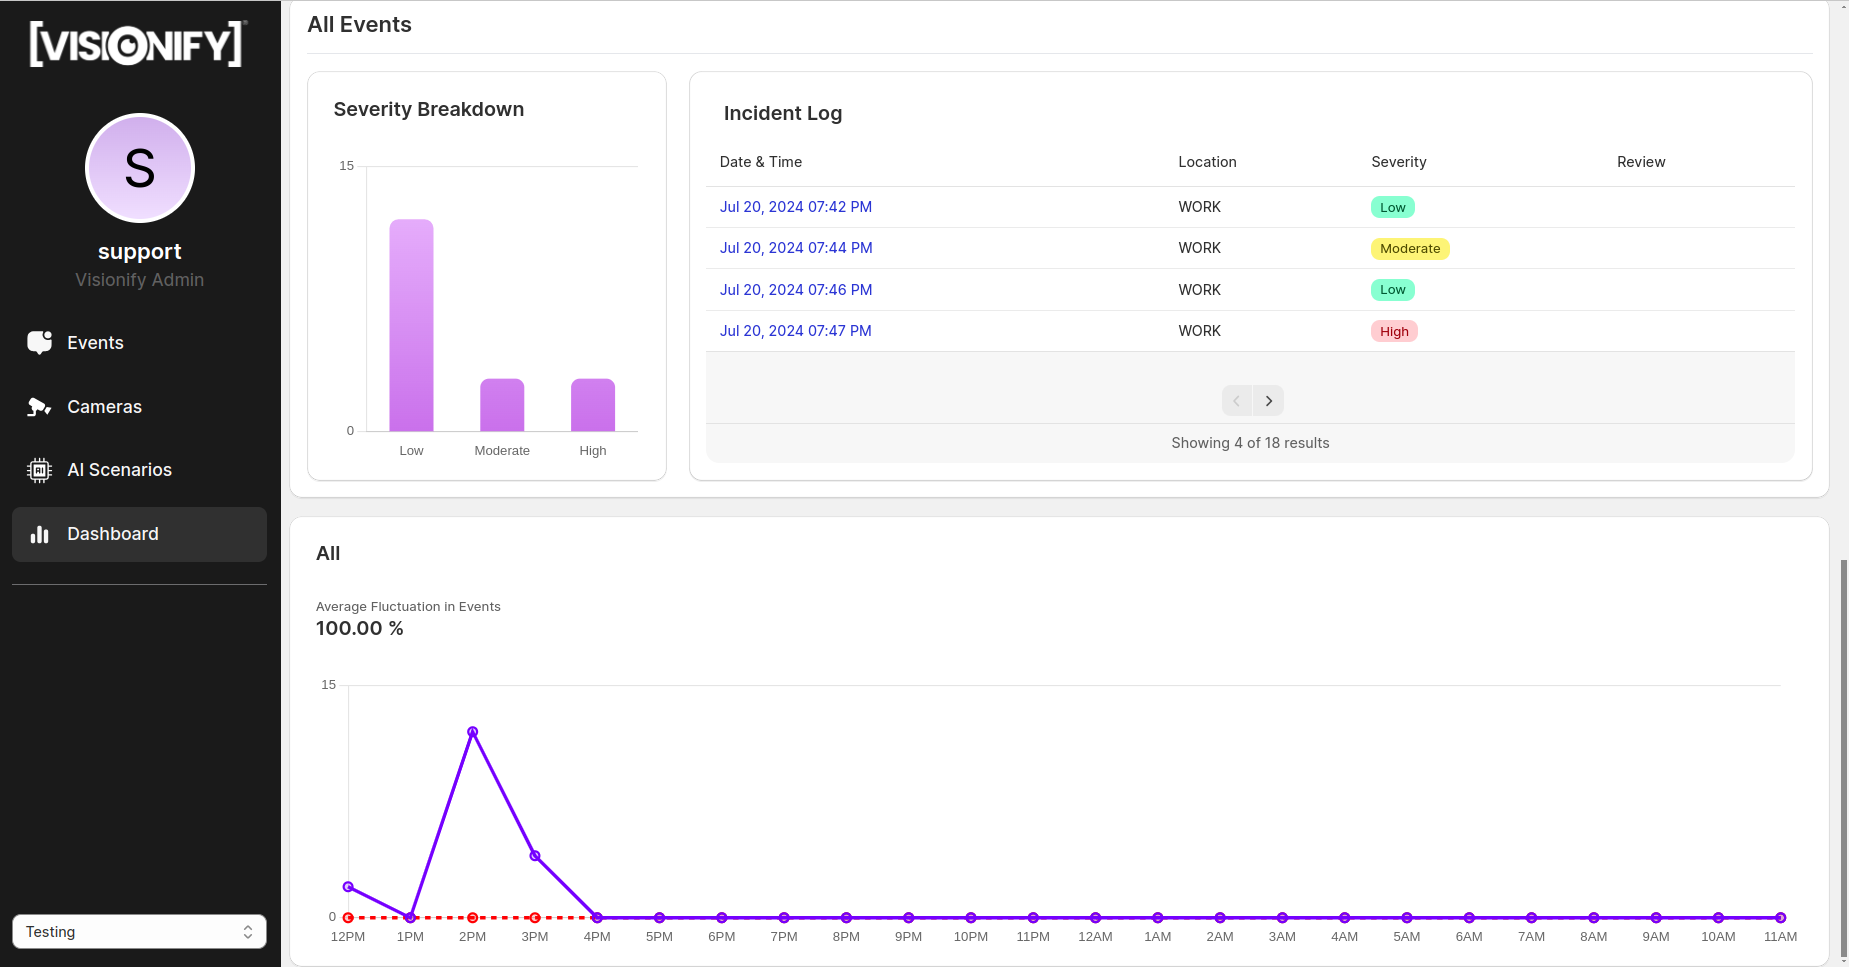
Graphs
This page summarizes the events that occurred in the form of graphical representation.
Settings
- User
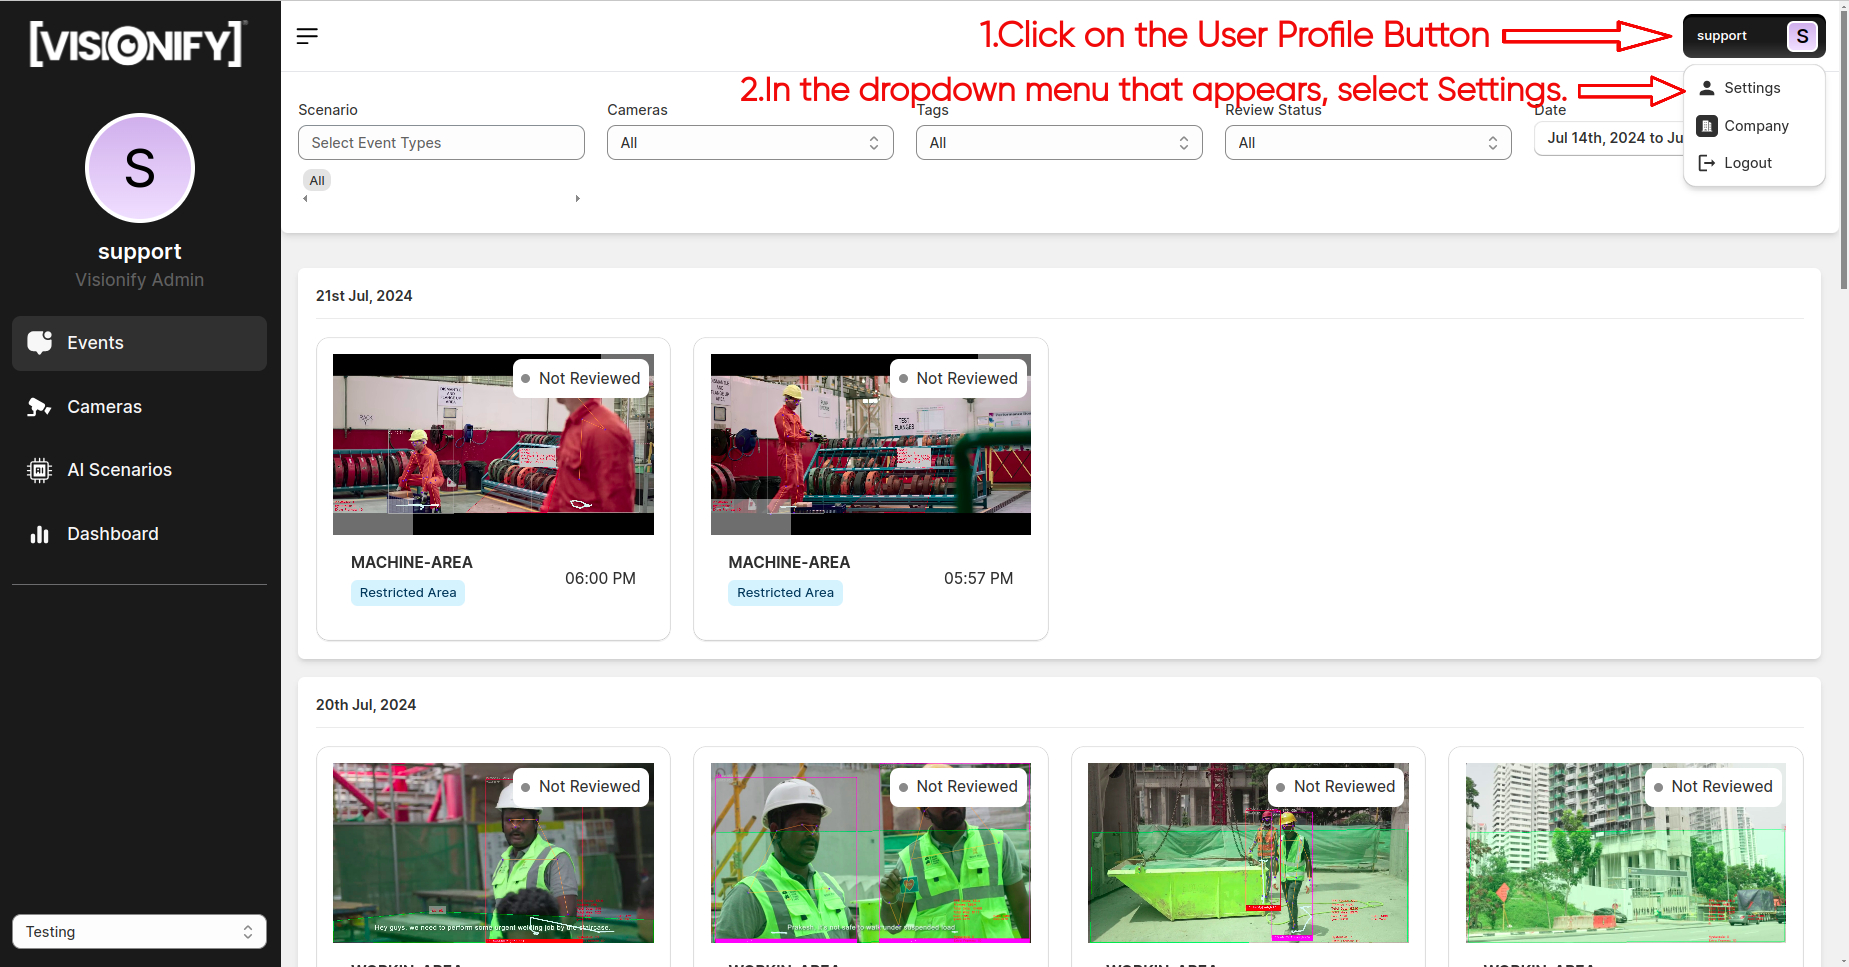
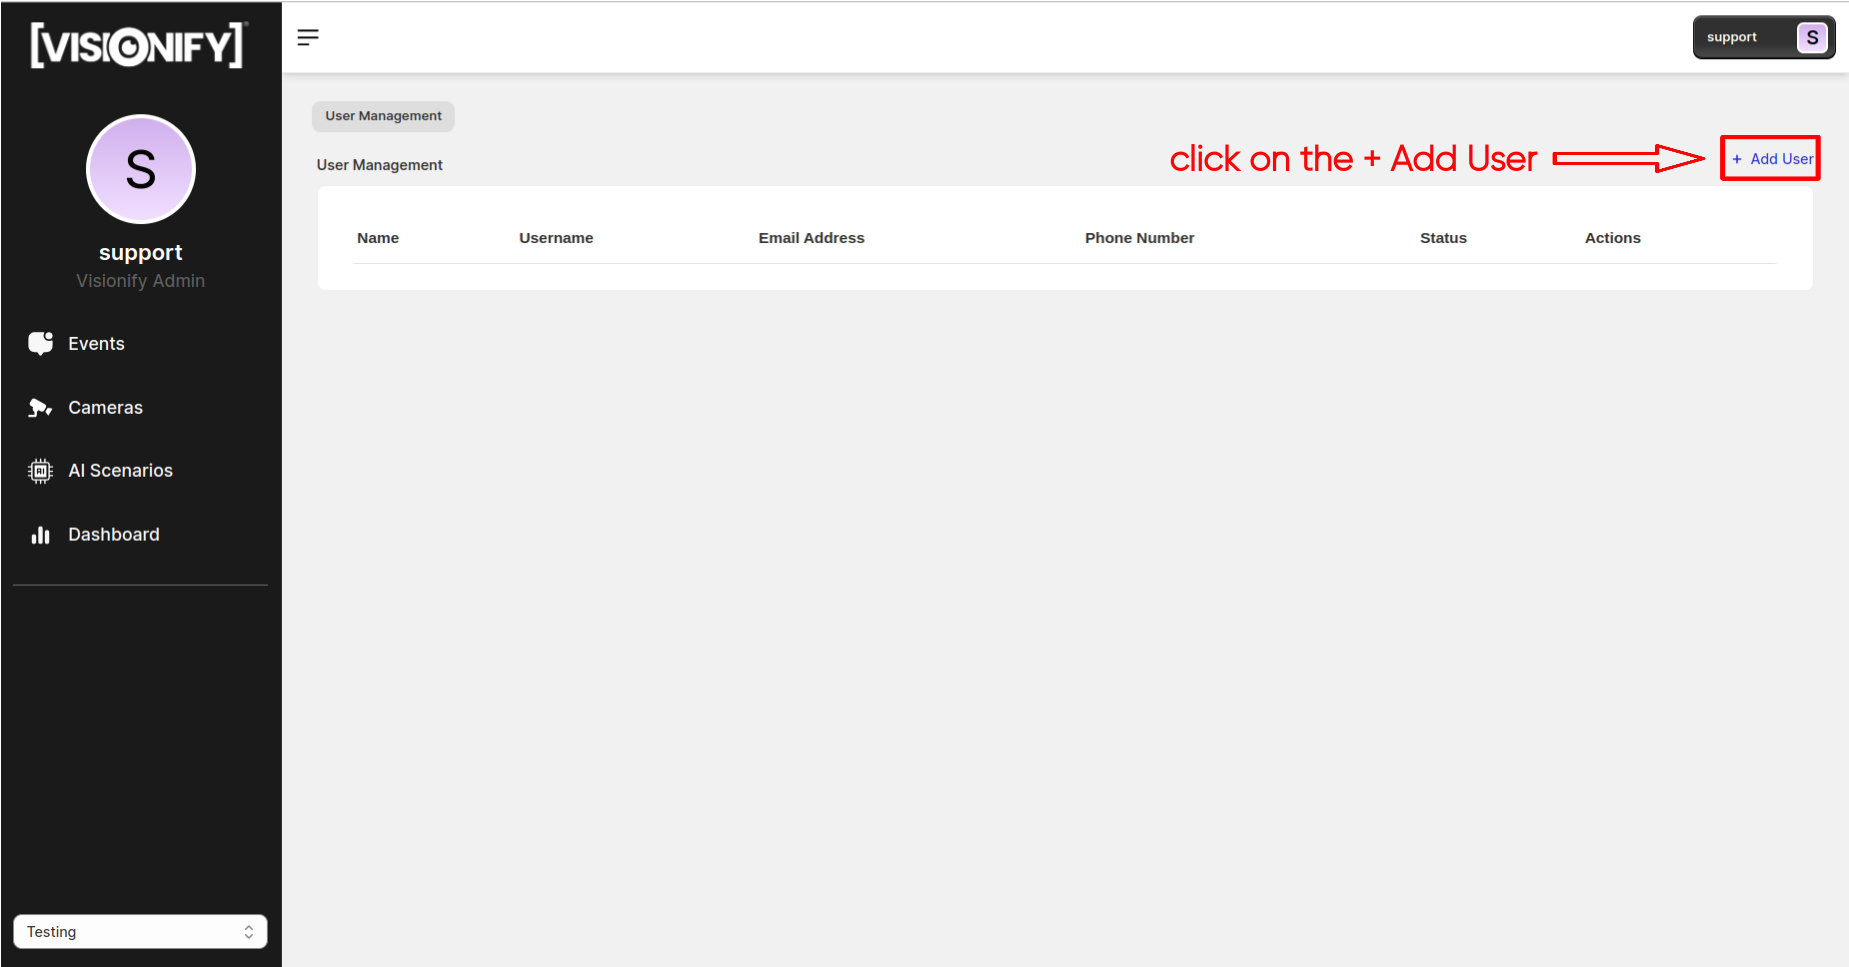
To enter the user settings, first locate and click on the user profile button at the top right corner of the screen. In the dropdown menu that appears, select 'Settings.' This action will open the user management page, allowing you to customize your preferences. On the user management page, click on the 'Add User' button to create a new user.
This action will open the user management page. Click on the '+ Add User' button to create a new user.
After clicking on the '+ Add User' button, a user fields box will open. Fill in the required fields and click on the 'Submit' button.
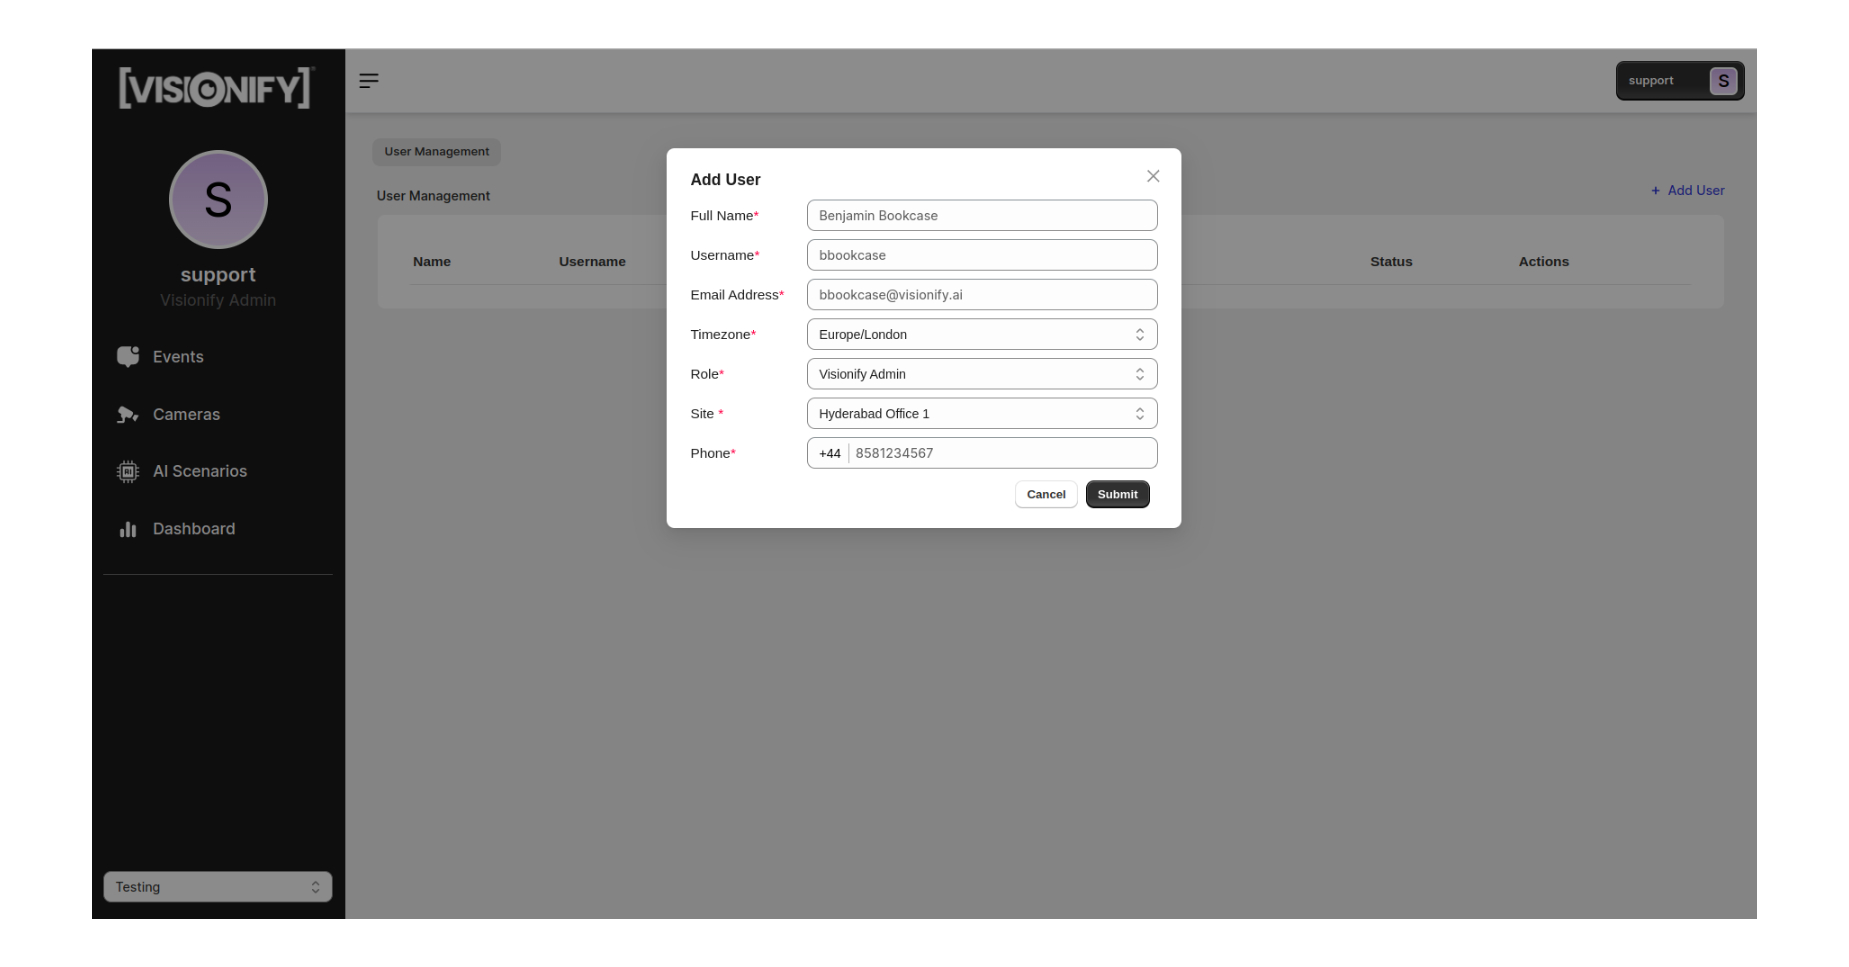
An invitation email will be sent to the provided email address. The user should then create a password by accepting the invitation through the email.